Is it Safe to Charge an EV Using a Dryer Outlet?
TL;DR
Key takeaways
- As electric vehicle adoption grows, many homeowners are discovering they already have access to faster charging by charging their EV with their dryer outlet.
On this page
- Quick Answer: Yes, It's Safe
- Understanding Dryer Outlet Safety
- What Makes It Safe?
- What Type of Dryer Outlet Do You Have?
- "I've been swapping my dryer plug and EV charger whenever I want to charge - is that a problem?"
- "But My Dryer Is In Another Room - What Can I Do?"
- The Recommended Solution: Professional Conduit Installation
- Understanding the Installation
- Cost Considerations
- Professional Installation vs. Alternative Approaches
- Example Installation: Real-World Power Tunnel Solution
- Components Used
- Installation Overview
- Key Implementation Notes
- Performance Specifications
- Safety Considerations
- The Bottom Line
- Frequently Asked Questions (FAQs)
Quick Answer: Yes, It's Safe
Updated: August 1, 2025
Key Takeaways:
- Safe when done properly - Dryer outlets (NEMA 14-30 or NEMA 10-30) provide the same 240V/30-amp power EVs need
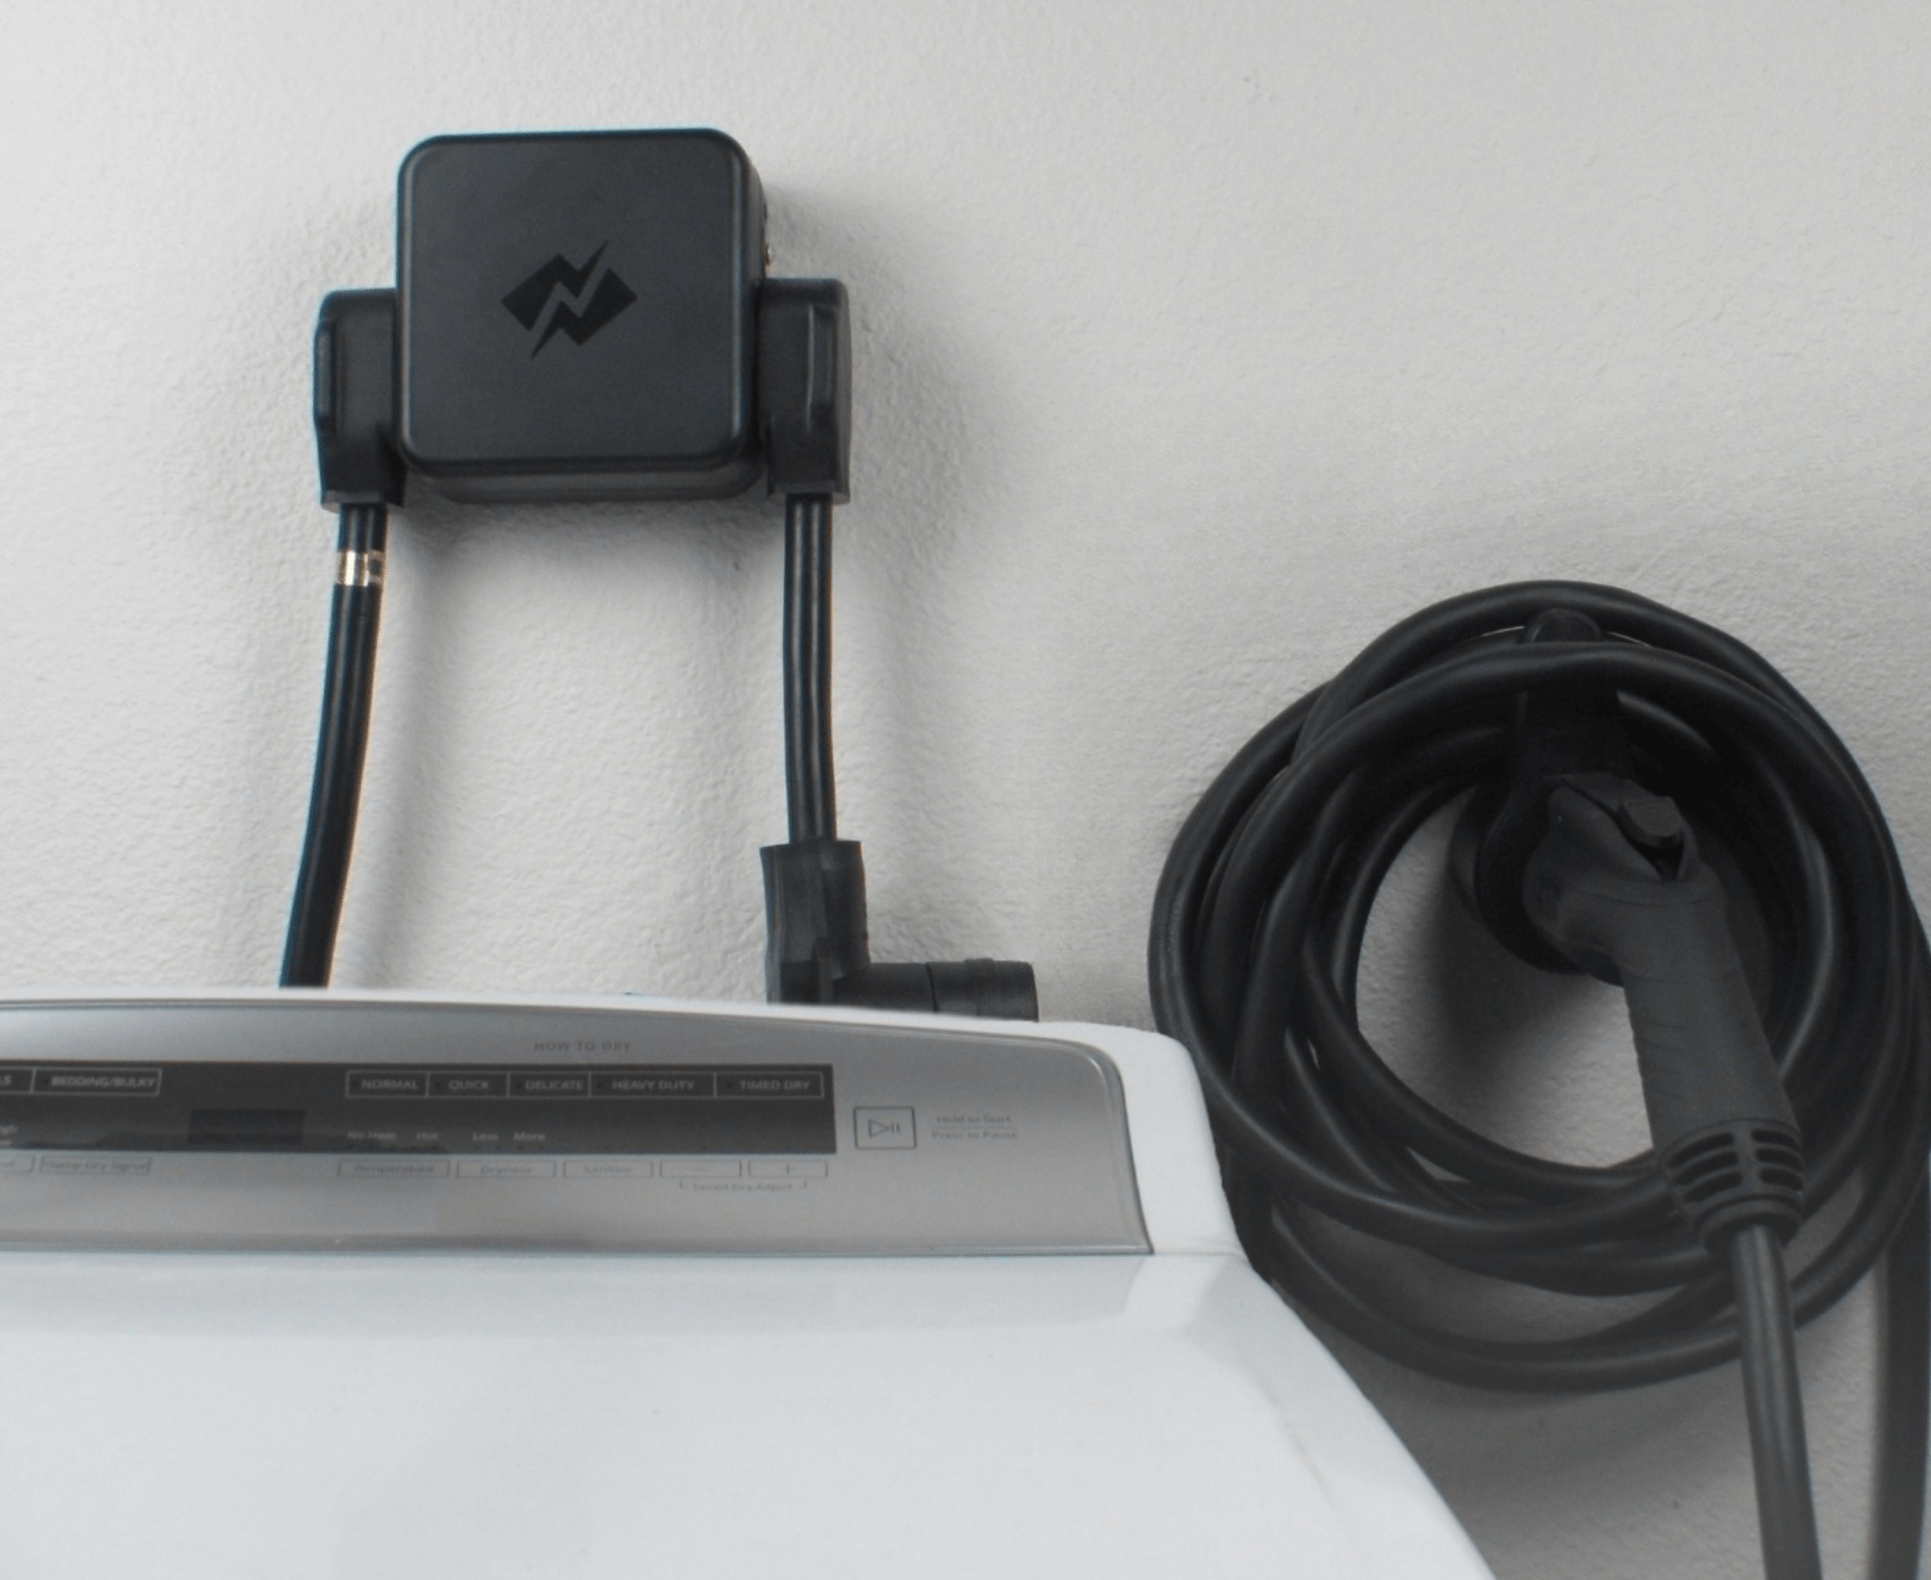
- Use proper equipment with auto switching - Use the NeoCharge Smart Splitter, which is UL listed, prevents overload with auto-switching, and eliminates plug swapping.
- Follow the 80% rule - Charge at a maximum of 24 amps on a 30-amp circuit
- Professional installation recommended - For through-wall connections, use licensed electrician with non-flexible conduit
- Cost-effective solution - $400-1,000 total vs. $2,000-4,000 for new circuit installation
As electric vehicle adoption grows, many homeowners are discovering they already have access to faster charging through their dryer outlet. But is it safe? The short answer is yes - with the right equipment and setup, charging your EV through a dryer outlet is both safe and code-compliant. Let's dive into the details of how to do this properly.
Understanding Dryer Outlet Safety
Your dryer outlet typically provides 240V power through a dedicated 30-amp circuit - the same type of power your EV can use for Level 2 charging. When properly set up, using this outlet for EV charging is just as safe as using it for your dryer. The key is using the right equipment and following proper safety protocols.
What Makes It Safe?
Your existing dryer circuit is actually perfectly suited for EV charging because clothes dryers and EVs have very similar electrical requirements. The standard dryer circuit in North American homes is designed to handle 30 amps at 240 volts - exactly what most Level 2 EV chargers need. This isn't a coincidence; both appliances were designed around this common household electrical standard. The wiring in your walls (typically 10-gauge copper wire) was selected specifically to handle this power level continuously and safely, with significant safety margins built in.
Furthermore, your dryer circuit already has several important safety features built into its installation. The circuit breaker was sized specifically for this load, the wiring was installed to handle the full rated current, and the outlet itself is rated for continuous use at these power levels. When you plug in an EV charger instead of (or alongside with a smart splitter) your dryer, you're using the circuit exactly as it was designed to be used - to provide 240V power to a major appliance. This is why you can have complete confidence in using your dryer circuit for EV charging, provided you're using proper UL-listed equipment and following the manufacturer's instructions.
Modern circuit-sharing devices like the NeoCharge Smart Splitter designed for EV charging come with multiple safety features:
- UL certification ensures they meet strict safety standards
- Automatic power management preventing circuit overload
- Automatic switching that prevents simultaneous high-power usage
The National Electrical Code (NEC) explicitly allows for this type of setup, provided you follow the 80% continuous load rule - meaning on a 30-amp circuit, you'll charge at a maximum of 24 amps. This built-in safety margin ensures your electrical system operates well within its capabilities.
There are also EV-grade dryer outlets that have improved mechanical properties over a standard dryer outlet. If you plan to regularly charge using a dryer outlet it is recommended to swap out your older outlet for even more peace of mind.
What Type of Dryer Outlet Do You Have?
Most homes have one of two dryer outlet types:
- NEMA 14-30: 4-prong outlet (newer homes, post-1996) - includes ground wire
- NEMA 10-30: 3-prong outlet (older homes) - no dedicated ground wire
Both outlet types work safely for EV charging with the proper adapters and circuit sharing equipment. The NEMA 14-30 is preferred for its dedicated ground wire, but NEMA 10-30 outlets are equally safe when used with appropriate UL-listed equipment.
"I've been swapping my dryer plug and EV charger whenever I want to charge - is that a problem?"
It is not good practice to regularly plug and un-plug 240V devices. The repeated action of plugging and unplugging can loosen the contacts on the inside of the receptacle, eventually making it looser and potentially leading to overheating within the wall outlet. Instead, opt for a safety-certified branch circuit splitter like the Smart Splitter which prevents the need for manually swapping plugs. This is a safer alternative and saves you the time and hassle of swapping the plugs out yourself. For more information, check out our article: Industrial vs Residential Grade 240V Outlets - Why You Should Upgrade for Your Home EV Charging
"But My Dryer Is In Another Room - What Can I Do?"
This is where installation may become tricky. When your dryer (or other 240v appliance) outlet isn't in the same room as where you need to charge your EV, there's a clear, code-compliant solution: installing a non-flexible conduit through the wall. This approach not only meets all National Electrical Code (NEC) requirements but also maintains the plug-and-play nature of your circuit-sharing device.
The Recommended Solution: Professional Conduit Installation
The safest and most code-compliant approach is to have a licensed electrician install a non-flexible conduit through your wall. This installation creates a permanent, protected pathway for your electrical connections while keeping the setup simple and user-friendly. Here's what makes this solution ideal:
- Code Compliance: Non-flexible conduit meets all NEC requirements for through-wall wiring
- Professional Standards: Installation by a licensed electrician ensures everything is up to code
- Easy Access: Conduit terminations near both your circuit-sharing device and EV charger allow for simple plug-in access
- Long-term Reliability: A permanent conduit solution provides lasting protection for your wiring
Understanding the Installation
The installation process is straightforward when handled by a professional:
- The electrician determines the optimal route for the conduit
- They install the non-flexible conduit through the wall
- Proper termination points are created on both ends
- The setup allows for easy plug-in access to both your circuit sharing device and EV charger
Cost Considerations
While installing conduit requires some initial investment, it's still significantly more economical than installing a new circuit:
- Conduit installation: Typically $200-$500
- Circuit sharing device: $200-$500
- Total solution: Often under $1,000
- Compared to: $2,000-$4,000 for a new circuit installation when panel upgrades are otherwise required
Professional Installation vs. Alternative Approaches
While some users have successfully implemented DIY solutions using extension cords, we strongly recommend the professional conduit installation approach for several reasons:
- Ensures complete code compliance
- Provides maximum safety
- Offers long-term reliability
- Maintains home value
- Prevents potential insurance issues
Example Installation: Real-World Power Tunnel Solution
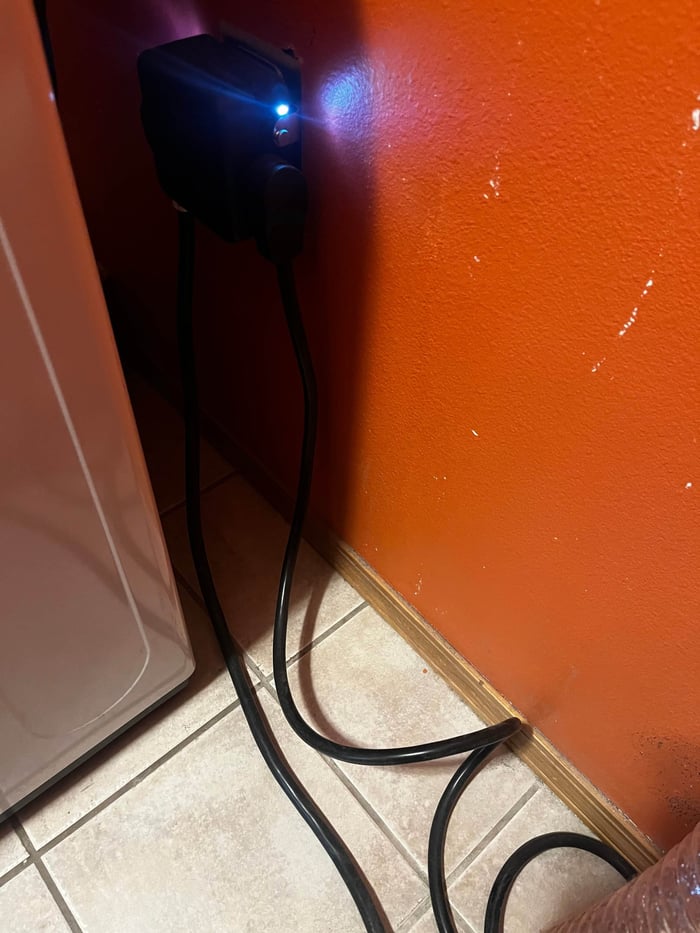
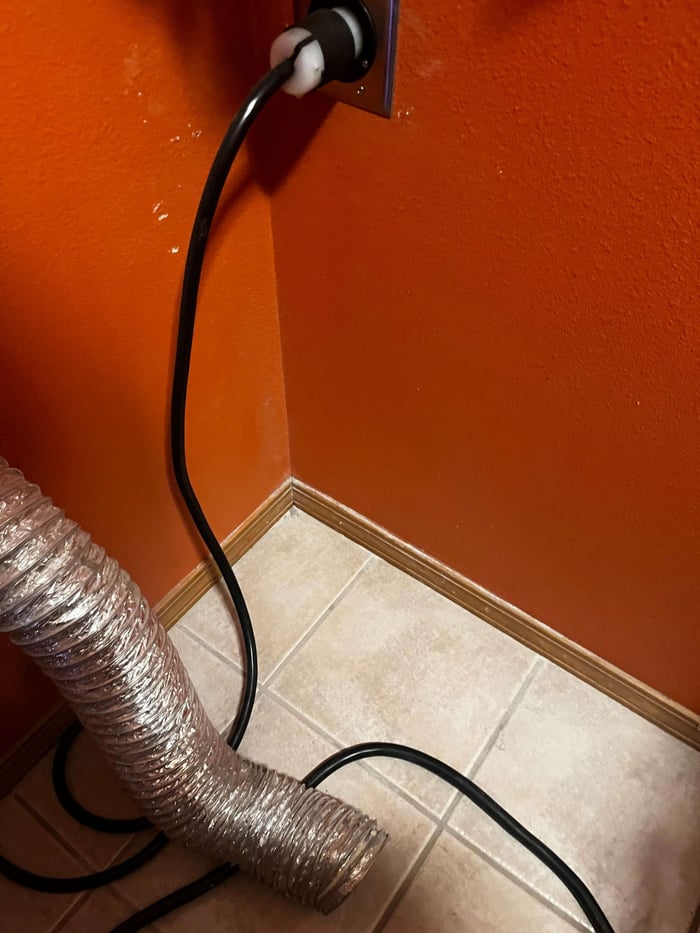
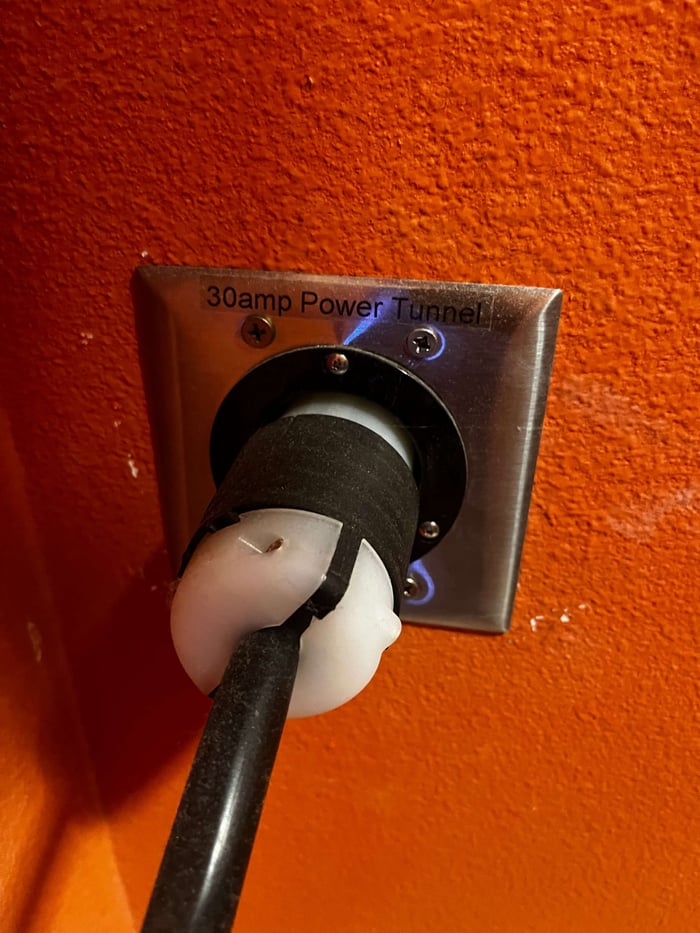
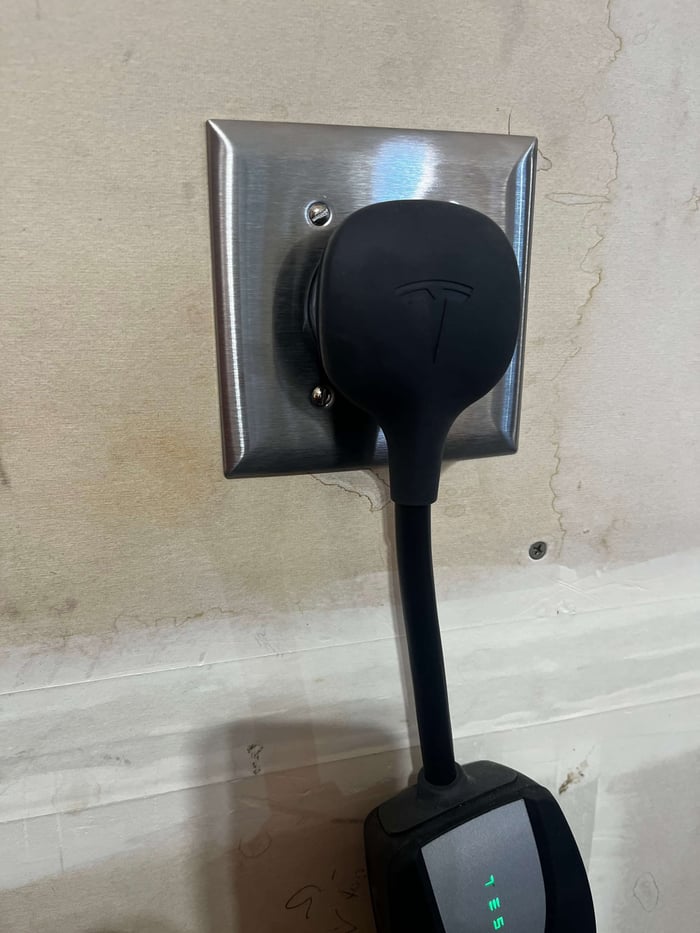
One of our customers successfully implemented a code-compliant charging solution using a 30-amp Power Tunnel to connect their laundry room dryer outlet to their garage charging location. Here's a detailed breakdown of their installation:
Components Used
- 1pc. L14-30 (locking 240v 30amp) power inlet mounted in stainless steel cover plate ( mounted near existing Dryer Outlet)
- 1pc. 14-30 power outlet with stainless steel cover plate (mounted near Electric Vehicle)
1pc. 7ft (Find the length for your cable) Power cable with 14-30 male plug to L14-30 female connector (twist lock)
- 2pc. double gang retro fit boxes
- 1pc. 3-foot length of romex 10/3 (10 gauge), 30amp cable
Installation Overview
The customer's setup demonstrates a practical solution for connecting a dryer outlet to an EV charger in an adjacent room. Here's how they implemented it:
- Wall Conduit
- Romex: Installed a conduit through the wall using Romex 10/3 cable
- NEC guidelines: The circuit should be protected by a 30A breaker, and Romex must be installed in a manner that is safe, such as securing it properly within walls and following distance requirements between studs, junction boxes, and other elements.
- Permanent wiring installation installed by licensed electrician
- Power Inlet and Outlet
- L14-30 Power Inlet: This is a twist-lock connector rated for 240V and 30 amps, typically used for generator hookups. It is acceptable for this purpose as long as the wiring and breaker are appropriate for 30 amps.
- 14-30 Power Outlet: Connecting all
- Secured the cable path to prevent strain on connections
- EVSE (Charger)
- Used the Tesla Mobile Connector that is automatically set to 24A using the correct NEMA 14-30P adapter
- Ensured easy access for daily charging connection, can unplug if needed.
Key Implementation Notes
The installation showcases several important best practices:
- Clean, professional appearance with proper wall plates
- Protected cable routing through the wall
- Easy access for both dryer and EV charging use
Performance Specifications
- Circuit Rating: 30 amps
- Charging Current: 24 amps (following 80% continuous load rule)
- Voltage: 240V
- Expected Charge Rate: ~25-30 miles of range per hour (vehicle dependent)
Safety Considerations
While this installation provides a clean and functional solution, it's important to note:
- Always verify local code requirements before similar installations
- Consider professional installation for permanent modifications
- Ensure proper circuit protection and load calculations
- Maintain accessibility for both plugs
- Regular inspection of all connection points
This example demonstrates how a well-planned installation can provide convenient EV charging access while maintaining safety and functionality. The use of proper materials and attention to detail results in a solution that works reliably for both the dryer and EV charging needs.
The Bottom Line
Creating a safe, code-compliant connection between your dryer outlet and EV charging location is absolutely achievable. The key is doing it right - using proper conduit, professional installation, and quality components. This approach ensures you can safely and confidently charge your EV while maintaining access to your dryer, all while staying within electrical codes and safety standards.
Remember, while DIY solutions might seem tempting, the peace of mind that comes with a properly installed conduit system is worth the investment. Not only does it protect your home and family, but it also provides a lasting solution that maintains your home's value and your insurance coverage.
For the best results, consult with a licensed electrician who can evaluate your specific situation and install the appropriate conduit system. They can ensure your setup meets all local codes while providing the convenience and functionality you need for both your EV charging and dryer usage.
Frequently Asked Questions (FAQs)
Q: Is it actually safe to charge my EV using my dryer outlet?
A: Yes, it's completely safe when done properly. Dryer outlets provide 240V at 30 amps - exactly what Level 2 EV chargers need. The circuit is designed to handle this load continuously with built-in safety margins.
Q: Can I just unplug my dryer and plug in my EV charger?
A: Regularly swapping 240V plugs isn't recommended as it can loosen outlet contacts over time, leading to overheating and potential shock. Use a UL-certified circuit splitter like the NeoCharge Smart Splitter instead.
Q: What if my dryer is in a different room from where I park?
A: Have a licensed electrician install a non-flexible conduit through the wall. This creates a code-compliant connection between rooms for $200-500, much cheaper than installing a new circuit.
Q: How fast will my EV charge using a dryer outlet?
A: Following the 80% continuous load rule, you'll charge at 24 amps maximum, providing approximately 25-30 miles of range per hour (depending on your vehicle).
Q: Do I need to upgrade my electrical panel?
A: Usually not. If your dryer circuit is already working properly, the existing 30-amp breaker and 10-gauge wiring can handle EV charging without panel upgrades.
Q: What equipment do I need for a safe setup?
A: You need a UL-certified circuit sharing device (like the NeoCharge Smart Splitter), proper outlet rated for continuous use, and if connecting through walls, non-flexible conduit installed by a professional.
Q: Can I use this setup every day?
A: Yes, the circuit is designed for continuous use. With proper equipment, you can safely charge your EV daily while maintaining full dryer functionality.
Q: How long does it take to fully charge my EV using a dryer outlet?
A: At 24 amps (5.7 kW), most EVs gain 25-30 miles per hour. A typical 60 kWh battery can easily charge overnight and within 7 hours for a full charge from empty, but most daily charging is much faster since you're rarely charging from 0%.
Q: What's the total cost compared to installing a new circuit?
A: Circuit sharing setup typically costs $200-500 total, compared to $2,000-4,000 for new circuit installation when panel upgrades are required.
Q: What's the difference between NEMA 14-30 and NEMA 10-30 outlets for EV charging?A: NEMA 14-30 (4-prong) outlets have a dedicated ground wire and are found in newer homes. NEMA 10-30 (3-prong) outlets are in older homes. Both work safely for EV charging with proper adapters and equipment.
Related NeoCharge resources
-
NeoCharge Smart Splitter
Safely share a 240V outlet (dryer + EV) or charge two EVs without a panel upgrade.
-
Shop the Smart Splitter
See specs, compatibility, and pricing.
Key terms
- Level 2 charging
- Level 2 EV charging uses a 240V circuit (like a dryer outlet). It typically adds ~20–35 miles of range per hour, depending on your car and the circuit amperage.
- NEMA 14-30
- A NEMA 14-30 is a 240V, 30A dryer outlet. With a properly configured EV charger, it can usually support ~24A continuous charging (about 20–25 miles of range per hour for many EVs).
- EVSE
- EVSE stands for Electric Vehicle Supply Equipment (the “charger”). It safely delivers power to your EV and communicates with the car to control charging current.


