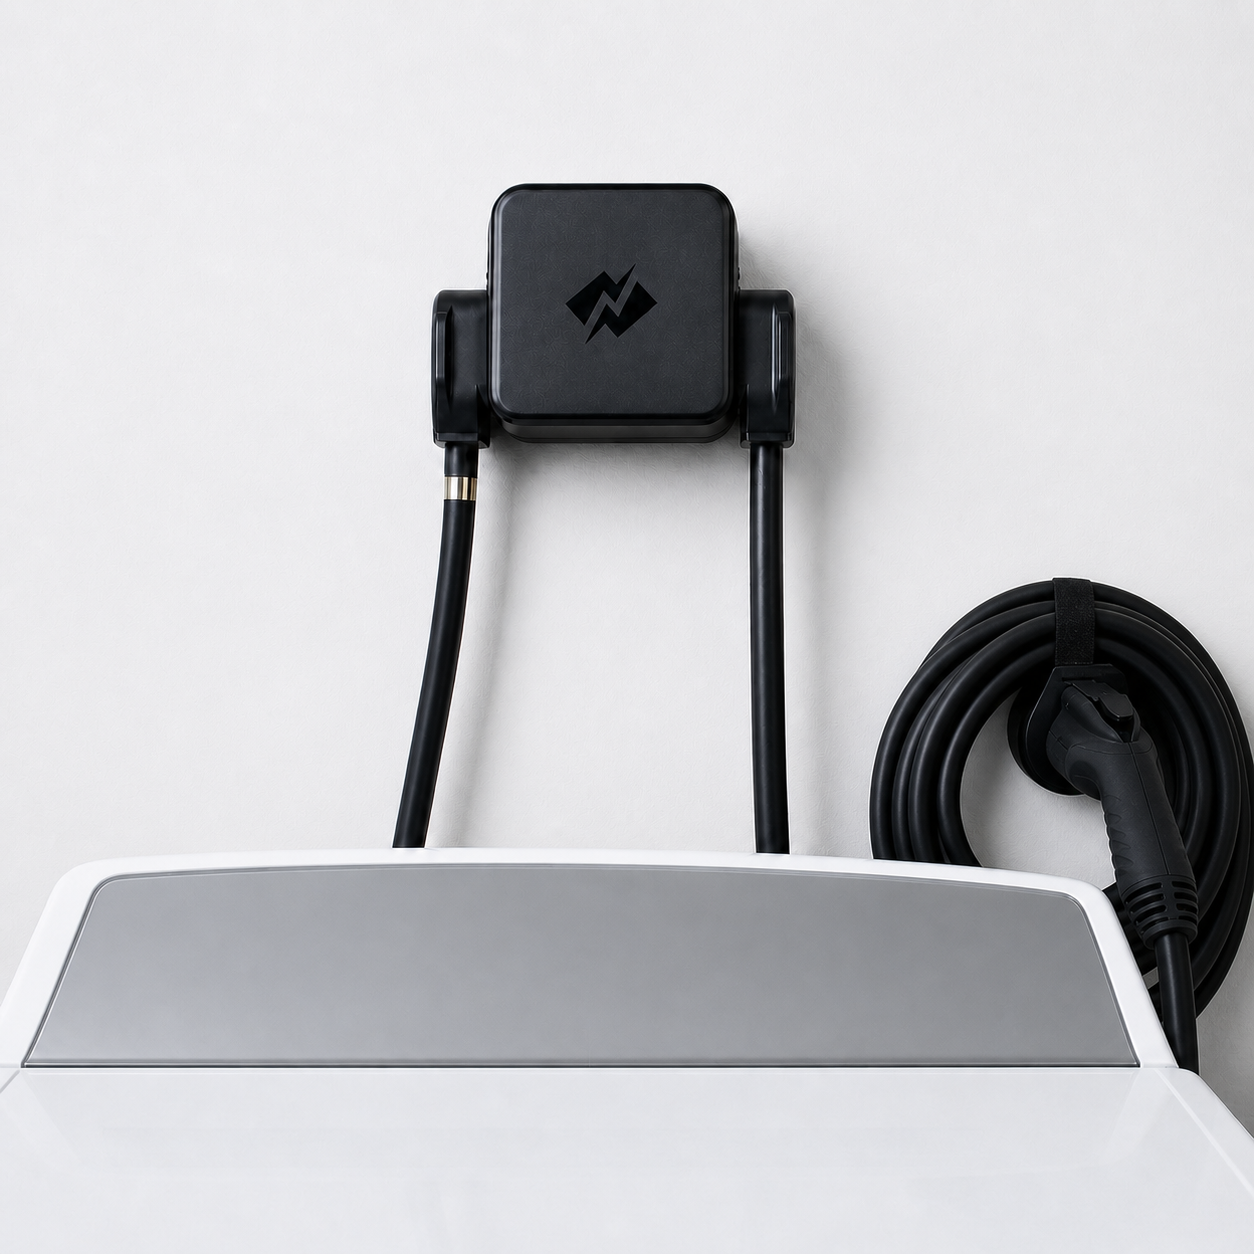
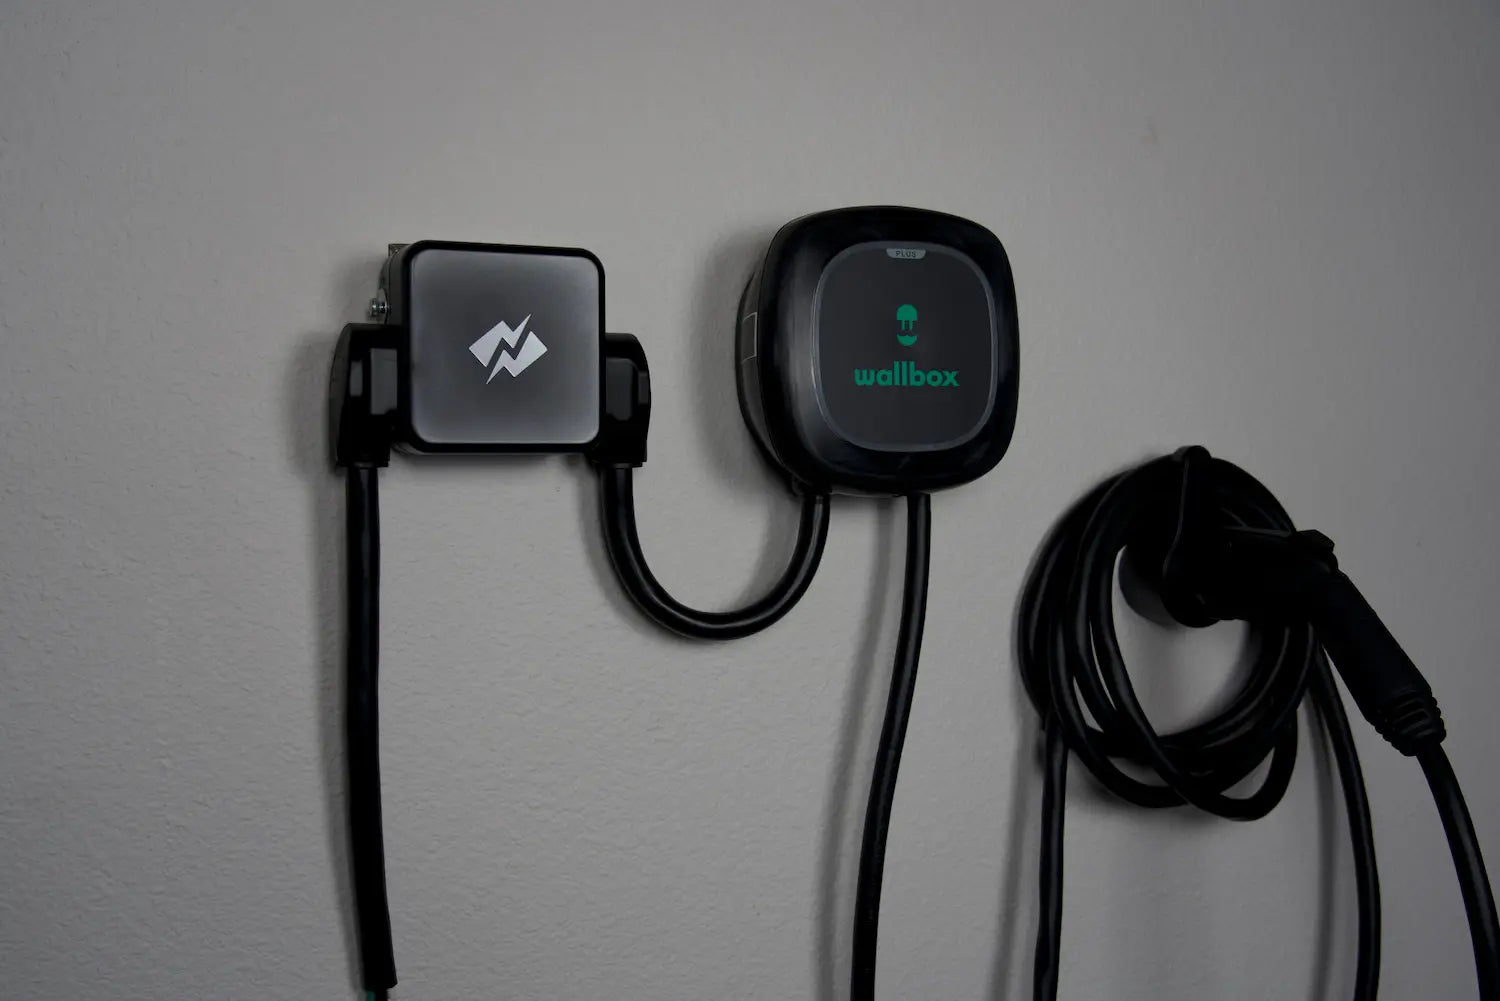


Smart Splitter setup
WiFi setup instructions
Connect your NeoCharge Smart Splitter to WiFi using the ESP/BLE provisioning flow. These steps are for units running firmware version 1900 and later.
Before you start
- 01 Reset into pairing mode Power cycle the breaker sequence to expose Bluetooth for WiFi setup.
- 02 Use ESP BLE Provisioning Open the provisioning app and select the NeoWiFi network.
- 03 Connect and update Enter your WiFi password and let the device finish its firmware update.
NOTICE:
This set of wifi instructions are for Smart Splitter that were purchased BEFORE January 2023.
If you purchased after January 2023 or these instructions don't work for you, please use these Wifi instructions instead:
https://getneocharge.com/pages/wifi-ble-ship
STEP 1. FACTORY RESET SMART SPLITTER
Please factory reset your Smart Splitter by turning your breaker off/on 5 times, waiting 3 seconds in between each breaker flip. WiFi Setup on the NeoCharge is exposed for the first 5 minutes after resetting.
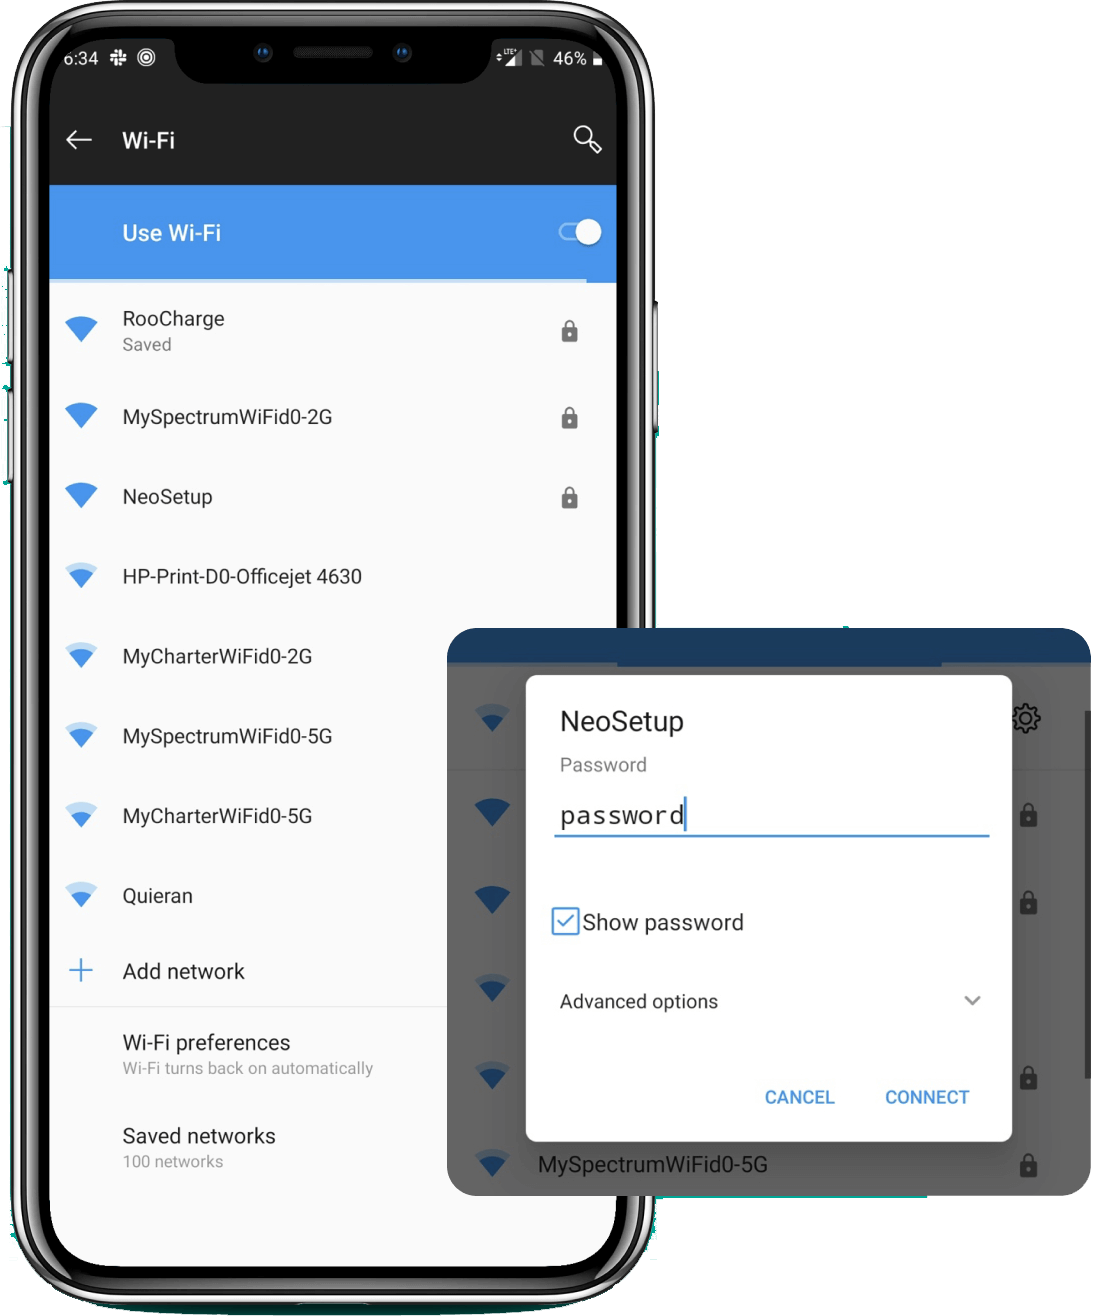
STEP 2. CONNECT TO NEOSETUP
Open the Wi-Fi Setting page on your mobile device. Select the NeoSetup Wi-Fi Network.
SSID: NeoSetup
Password: password
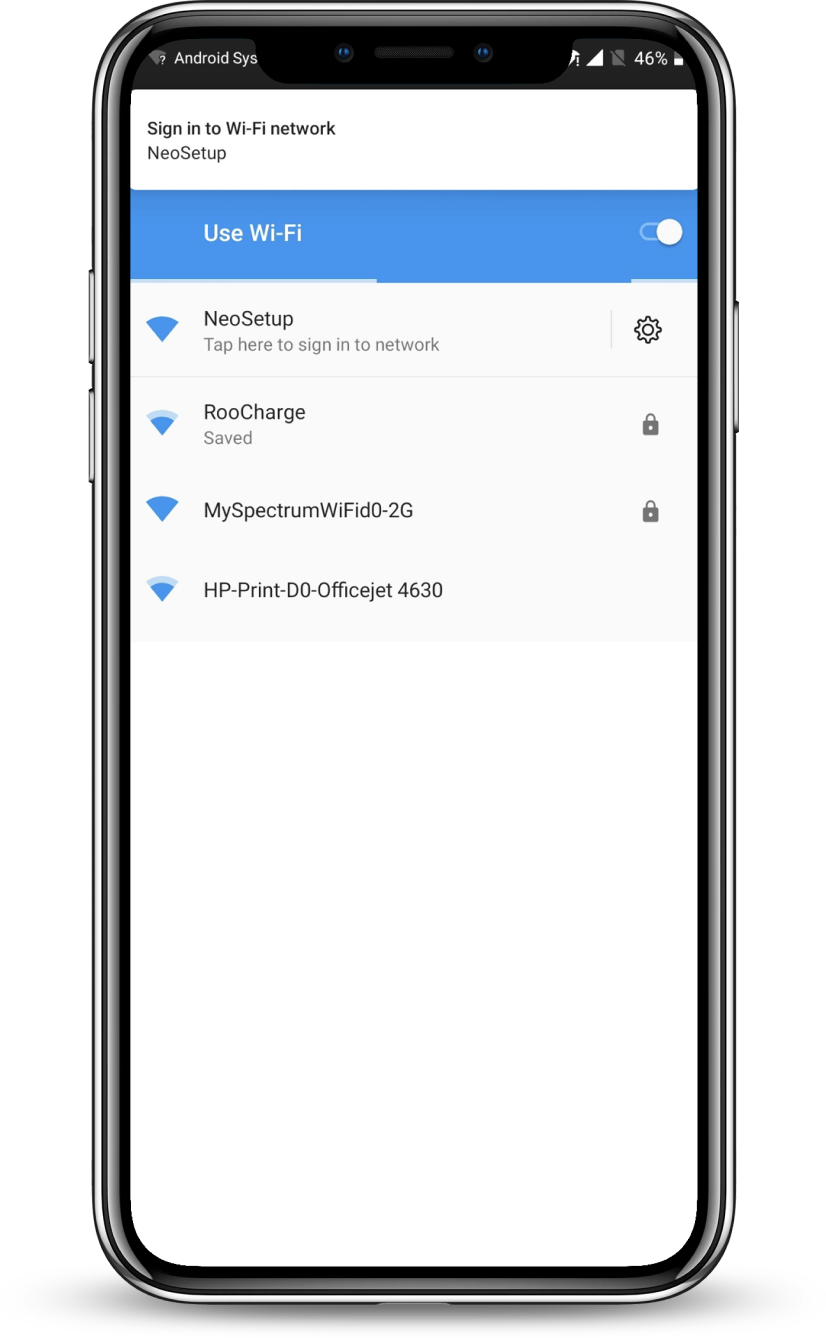
STEP 3. TAP THE SIGN IN TO NETWORK NOTIFICATION
If prompted, check the box to connect even through there is no network connection
If you don’t see an option to sign in, open your browser and go to the IP address
10.10.0.1
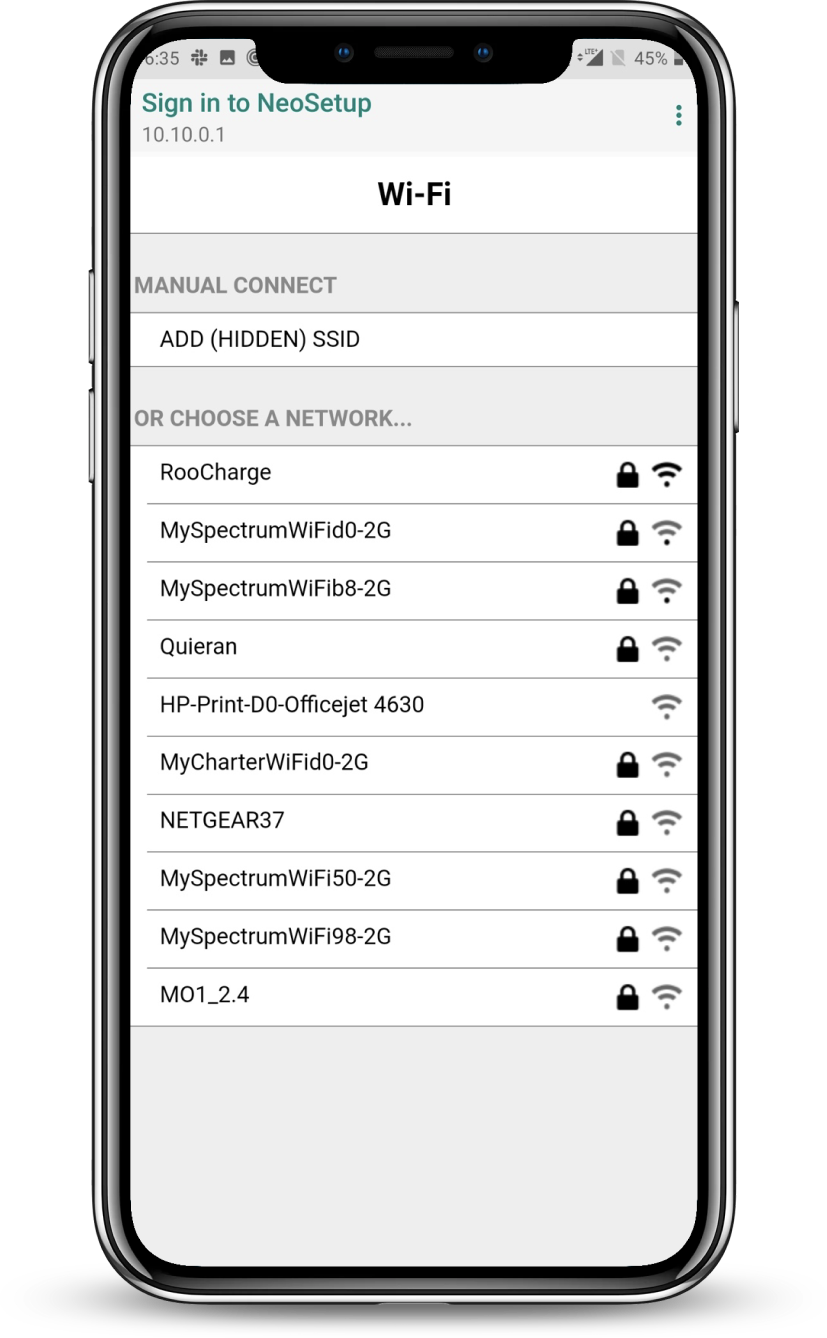
STEP 4. SELECT YOUR WIFI NETWORK
Choose the WiFi network you would like to connect your Smart Splitter to.
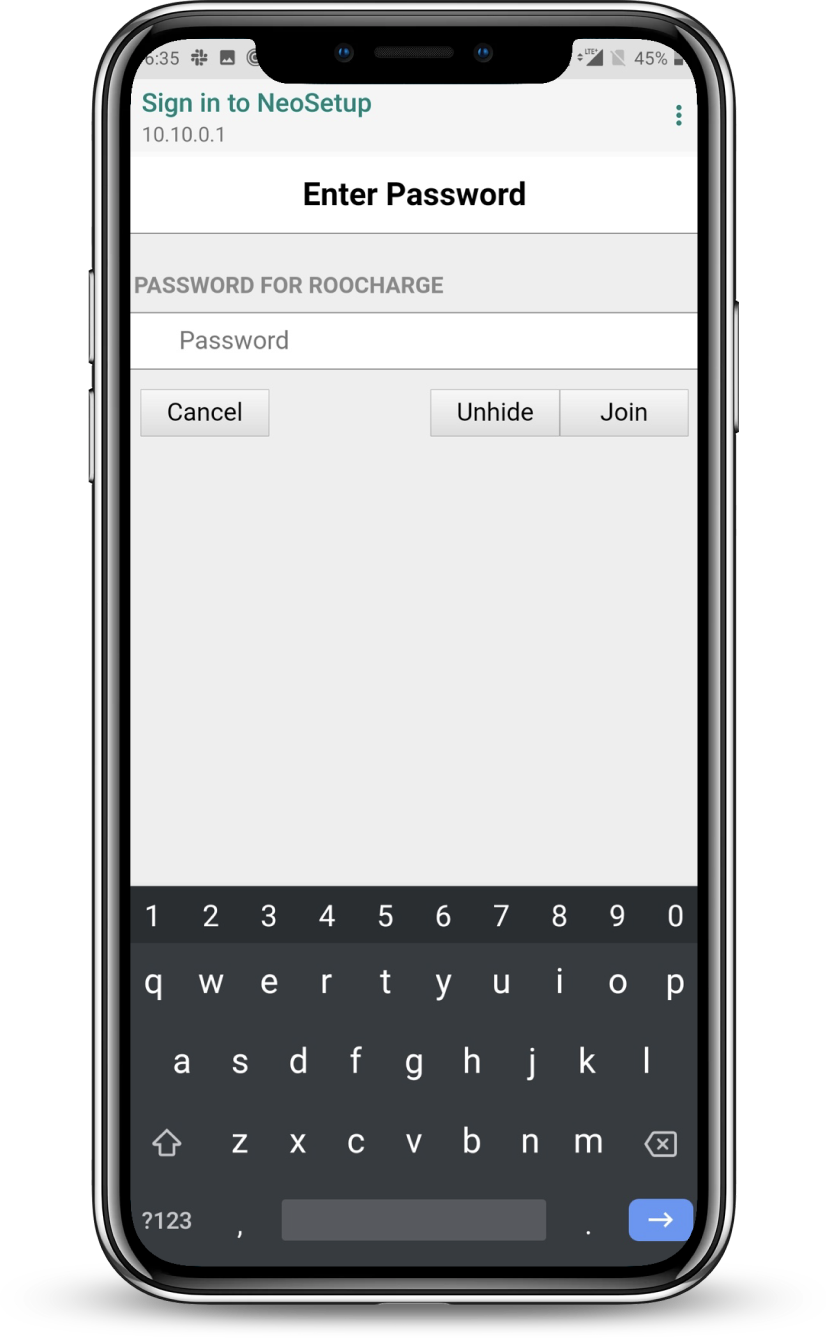
STEP 5. ENTER YOUR PASSWORD
Use the Unhide button if you want to preview your password
If the password is incorrect, you will be reverted to Step 5
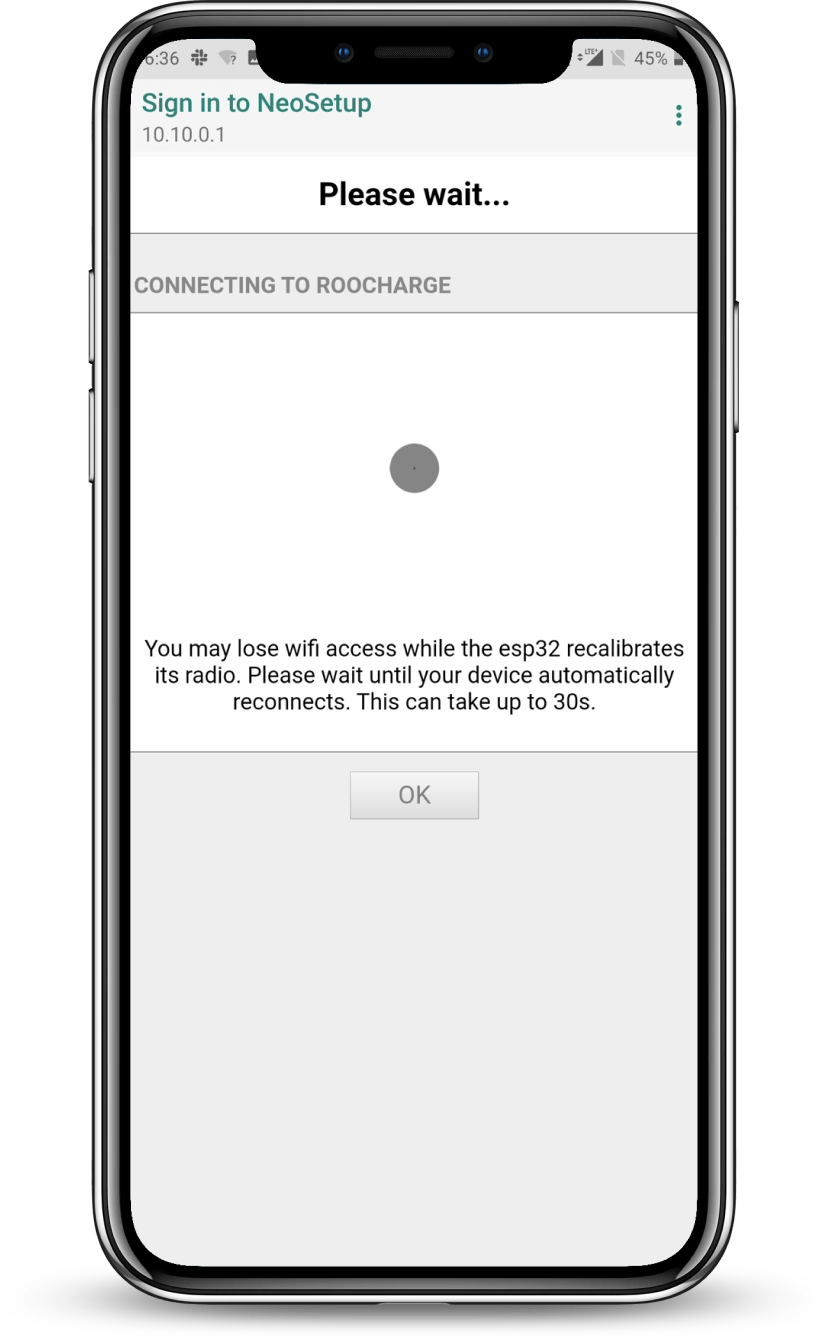
STEP 6. WAIT WHILE THE SMART SPLITTER CONNECTS TO THE NETWORK
NeoCharge may fail to connect to the WiFi network, in which case you will be reverted to Step 3 and will need to try again.
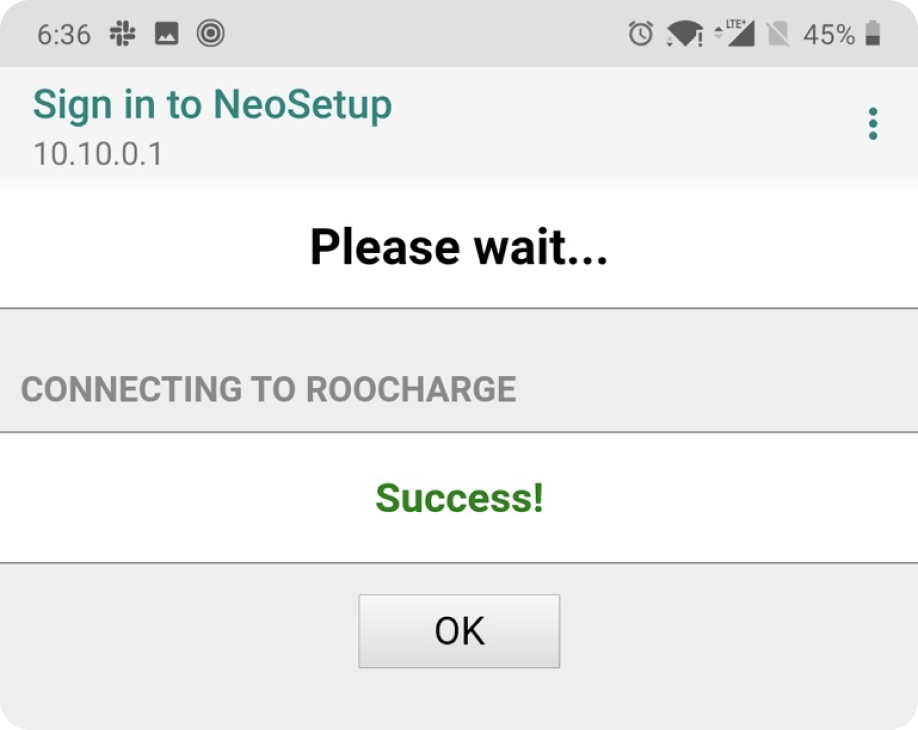
STEP 7. CONNECTION SUCCESS:
The Success message will be displayed to indicate that NeoCharge was able to successfully connect to Wi-Fi.
In some cases, you may not see this message, but the LEDs on the NeoCharge will turn blue for 5 seconds to indicate a successful connection.
To double check if NeoCharge has connected to the internet, open your Wi- Fi networks list, and NeoSetup should no longer be visible.
8. FIRMWARE UPDATE:
Once the NeoCharge connects to WiFi, if there’s a WiFi update available, it will try to automatically download the latest firmware from the NeoCharge Servers.
You may hear the NeoCharge Click on and off a few times during the process, but once the update is complete, the Indicator Lights will turn blue for 5 seconds and the NeoCharge will reboot and stop clicking. As a safety feature, the NeoCharge will disable your EV Charger connected to the Secondary side until the update is complete.
Go to the NEW NeoCharge App and complete WiFi Connection Setup
The steps before this ensures your device is up to date and can connect to our NEW NeoCharge App. Please follow the factory reset instructions in the NEW App to fully connect your Smart Splitter.


Need Further Help?
Find Home EV Charging Rebates
Learn more about Home EV Charging rebates by utility and state. The Smart Splitter is also rebated with many utilities in California like SMUD, CCCE, Tacoma Power, SVCE, SCE, and SBCE. Many more to come.
Need An Electrician for Home EV Charging Installation?
No problem! We've partnered with Treehouse for easy home charging installation in California and Arizona.

Talk to Our EV Charging Experts
We are here to help! You can chat with us through the bubble in the bottom right corner if you have any questions. You can also find most of your questions answered in our FAQ.
