





For electricians and installers
Energy Monitor + EMS Installer Guide
Install, wire and commission the NeoCharge Energy Monitor and set up Energy Management with an Autel charger. One guide covers both sensor kits.
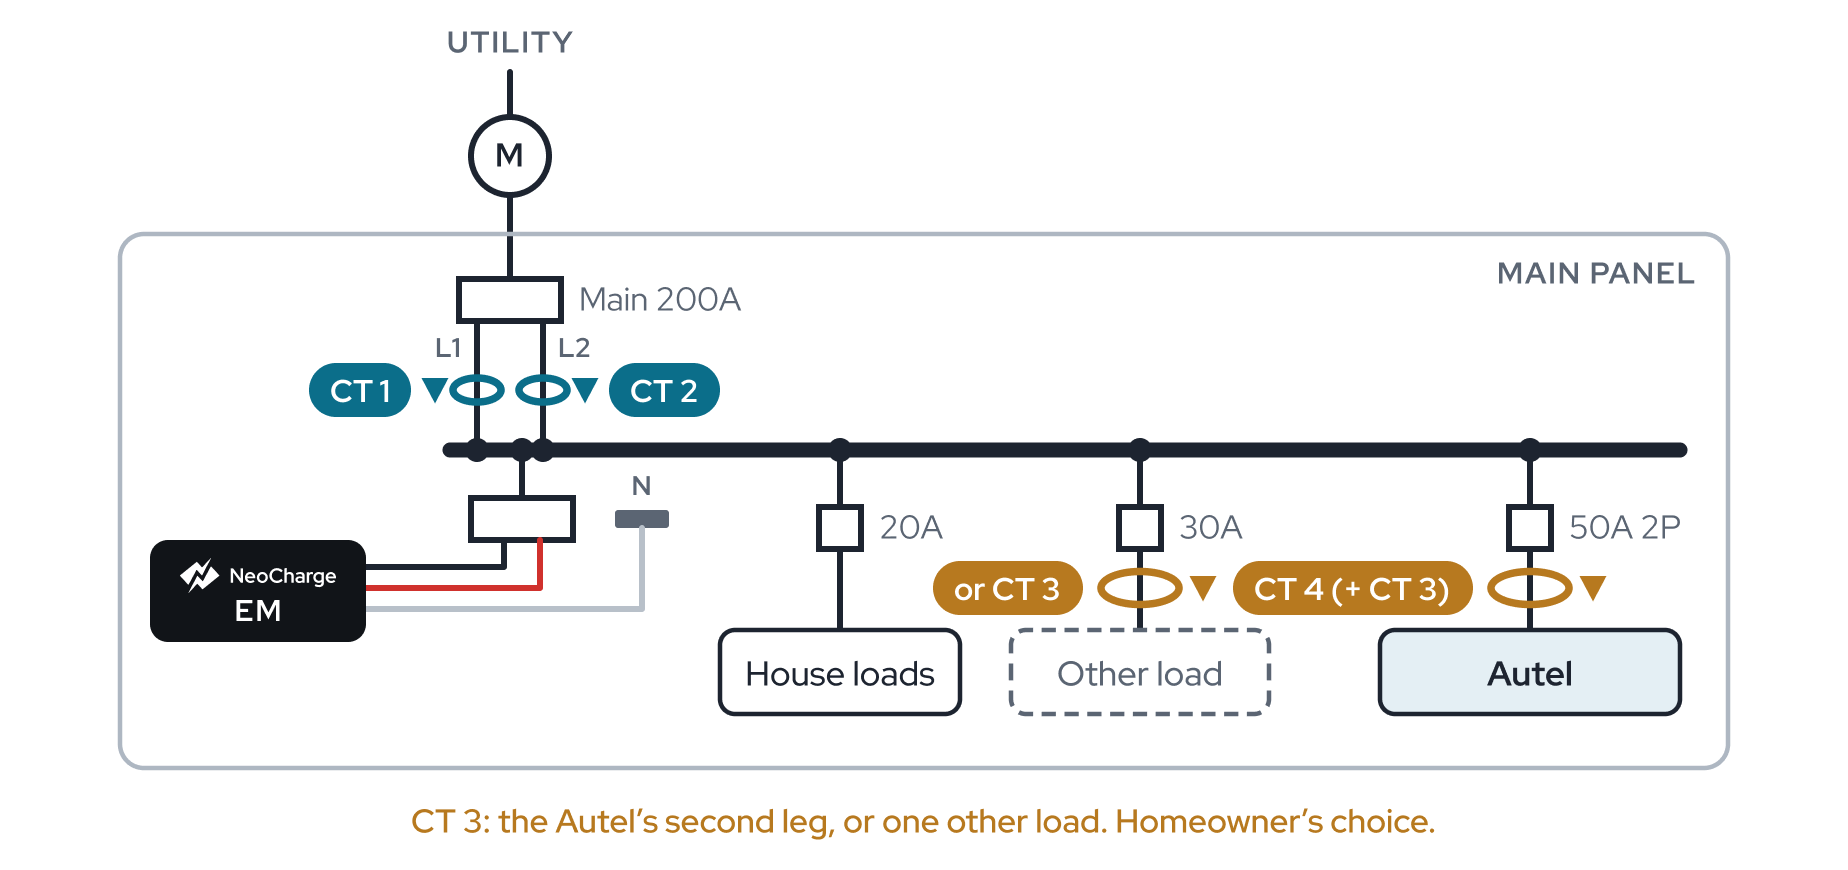
Wiring diagrams
Find the diagram for the site
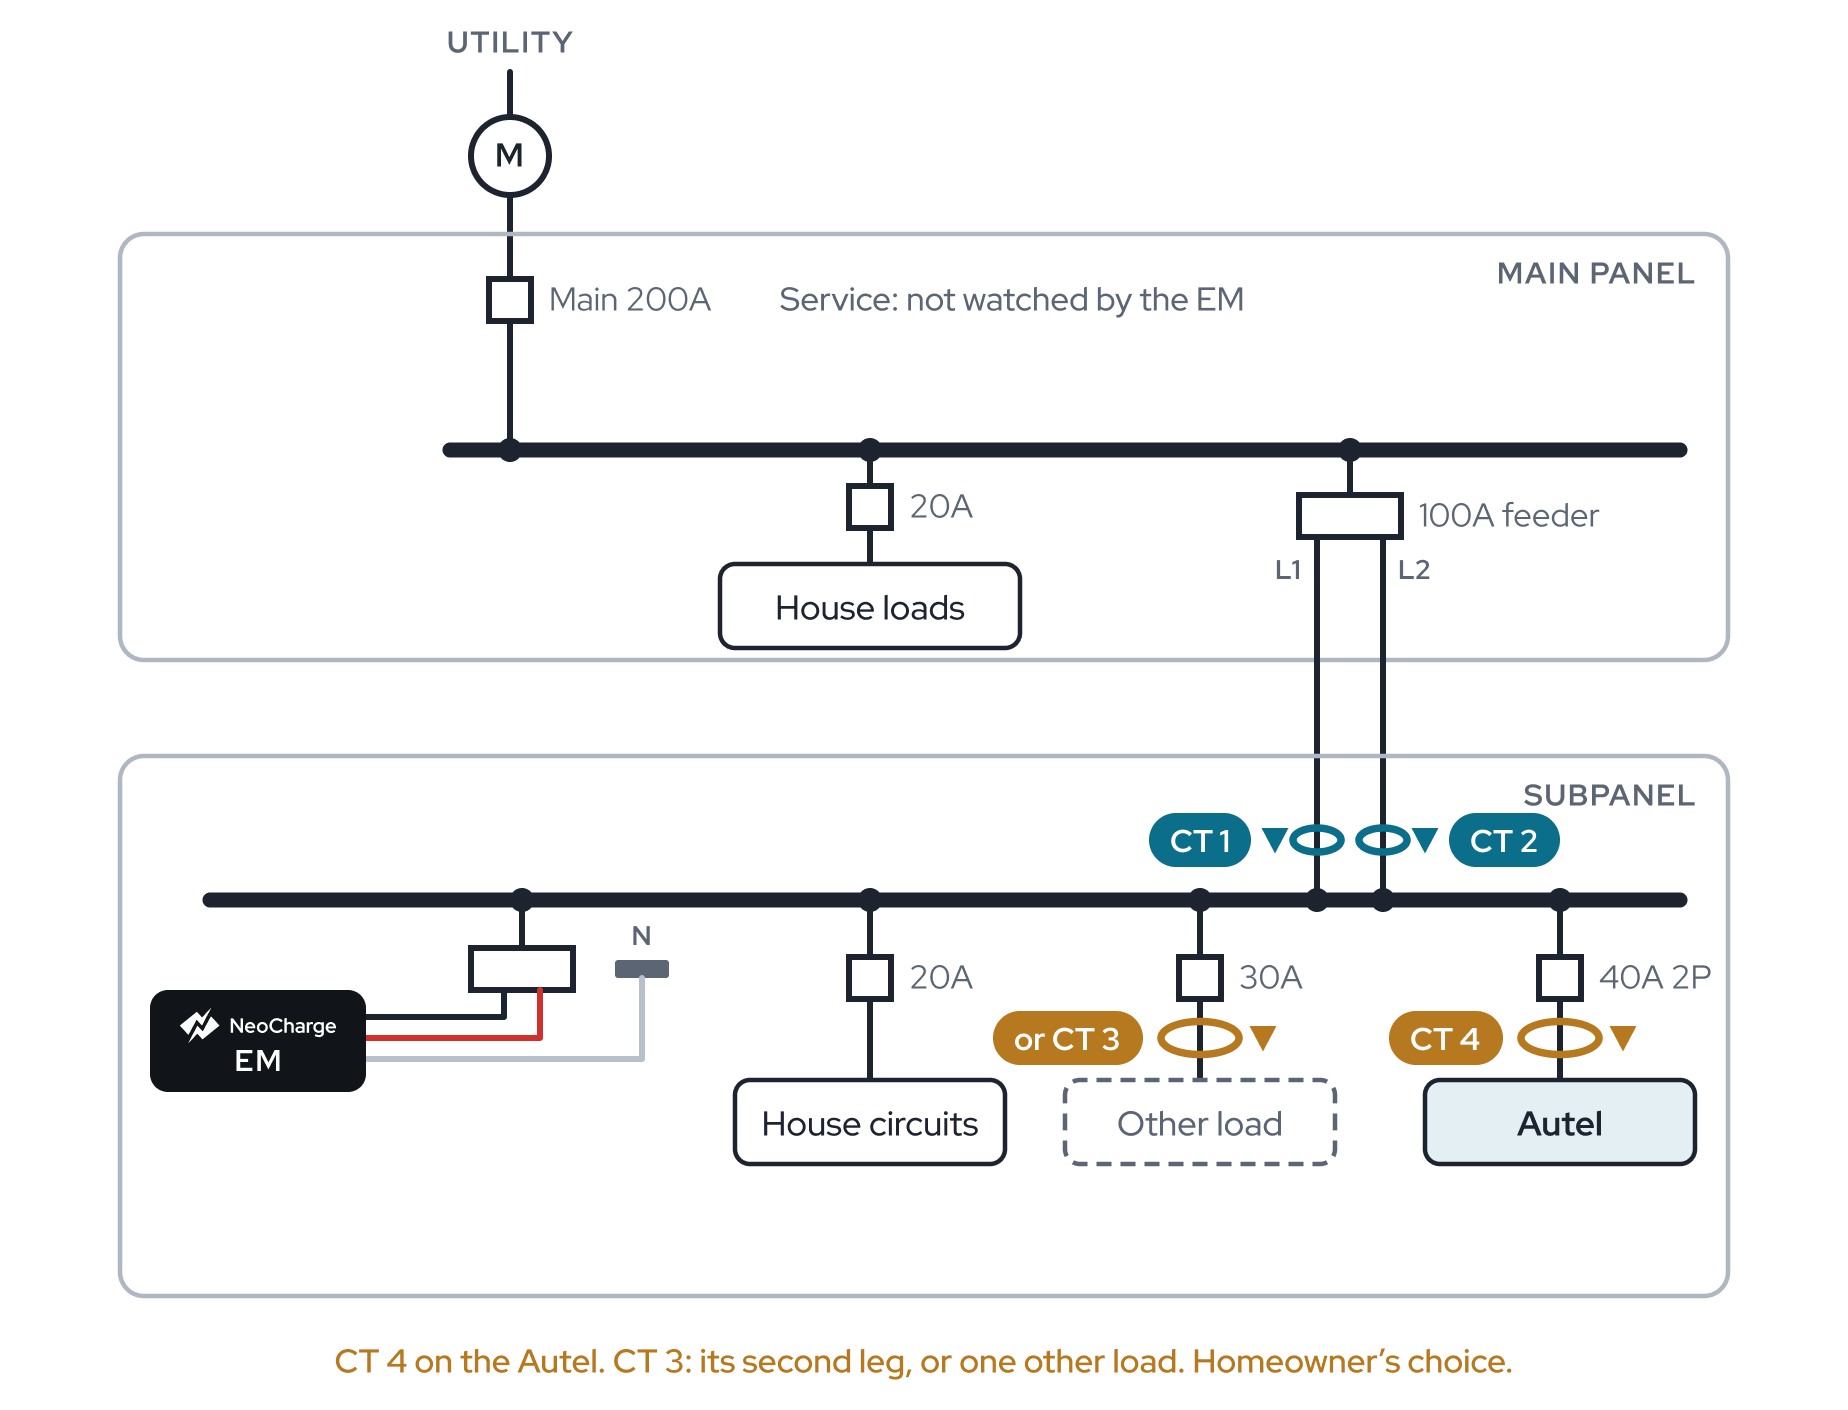
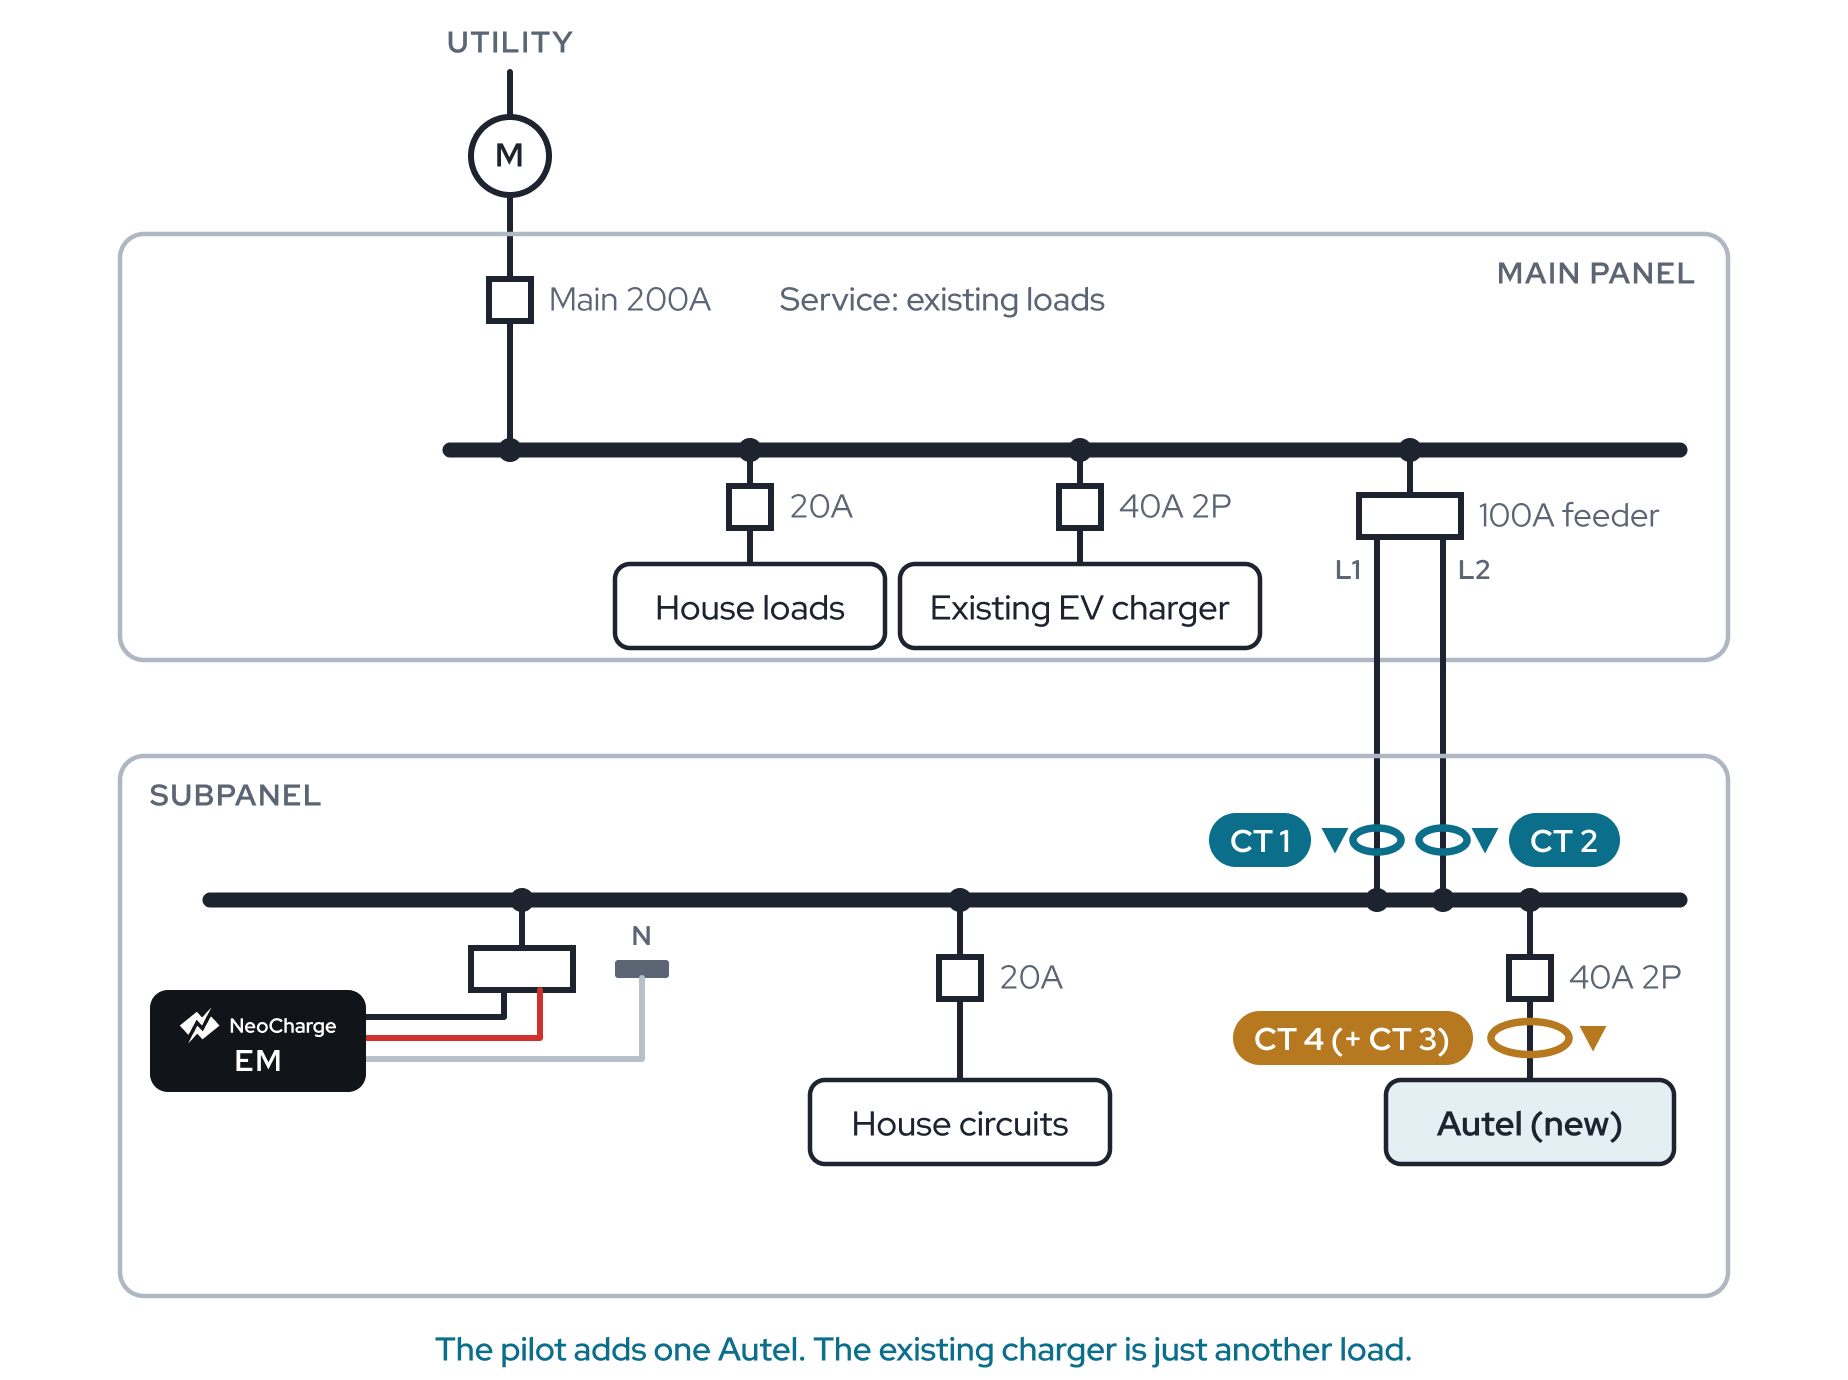
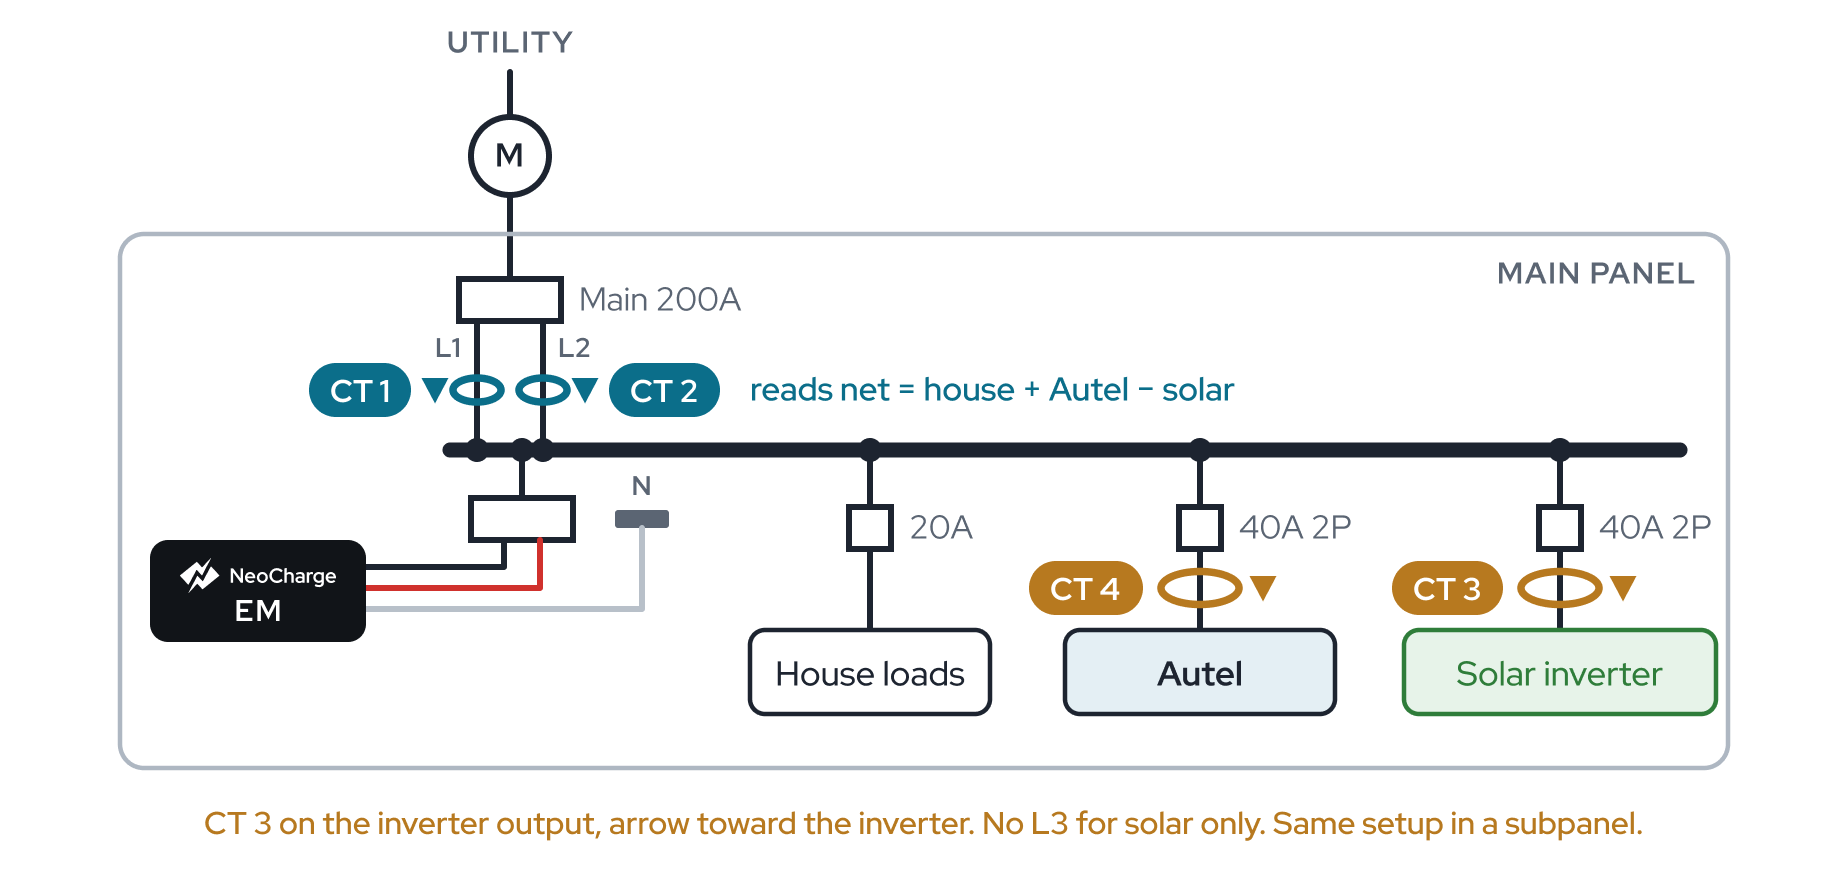
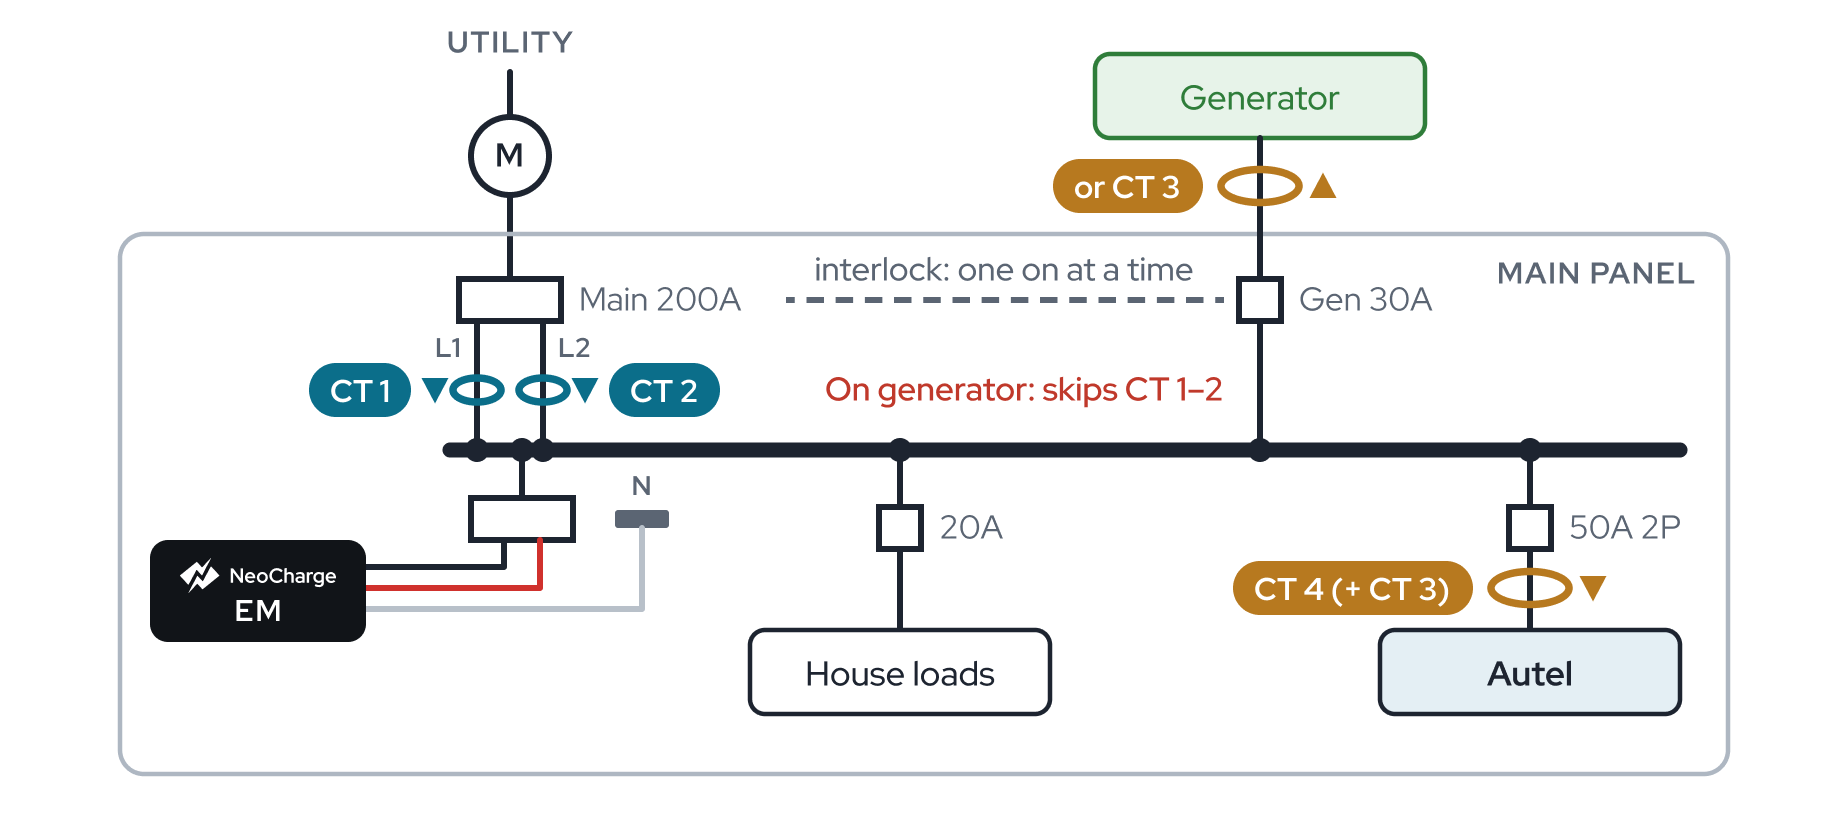
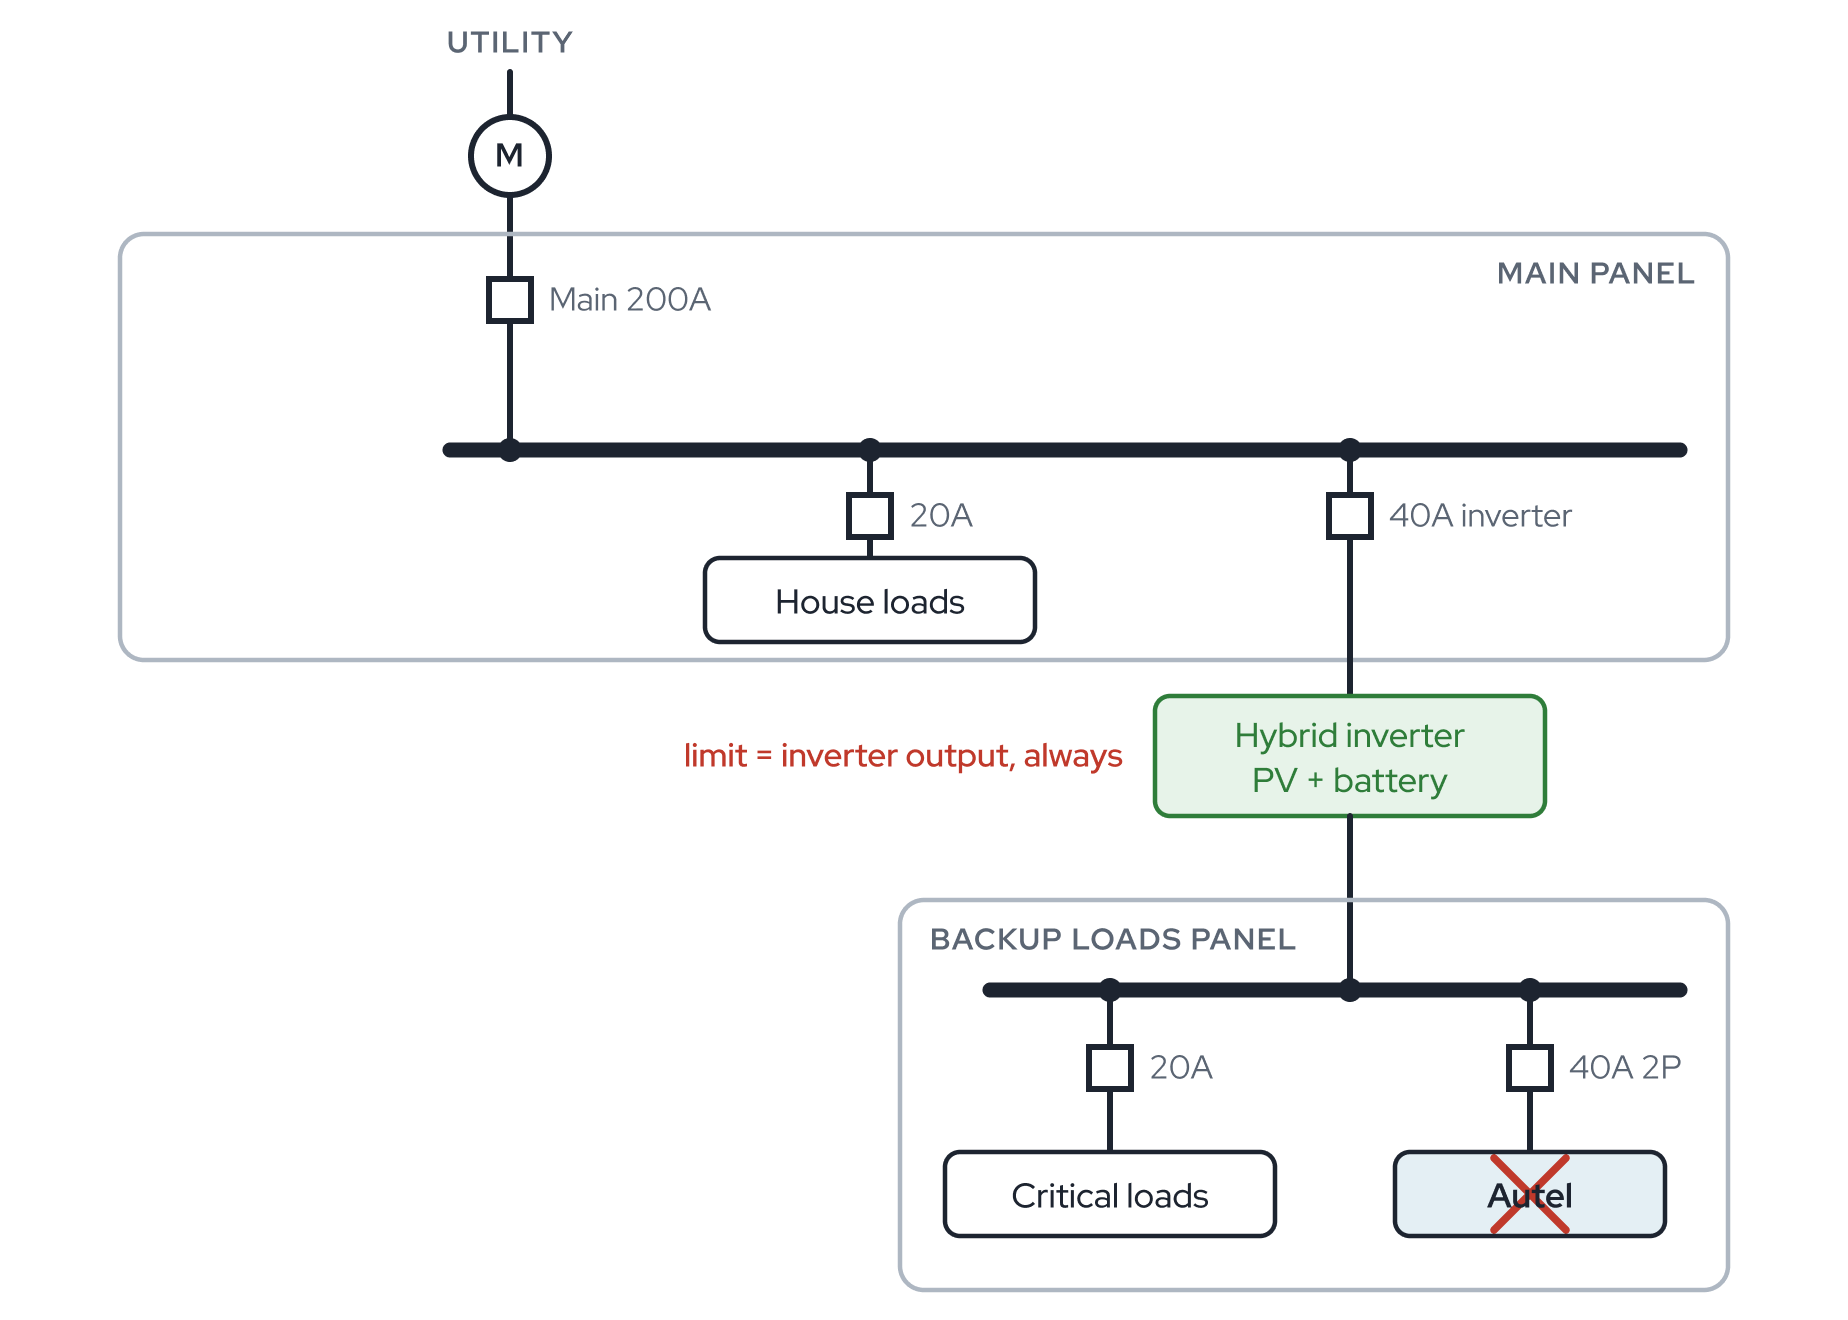
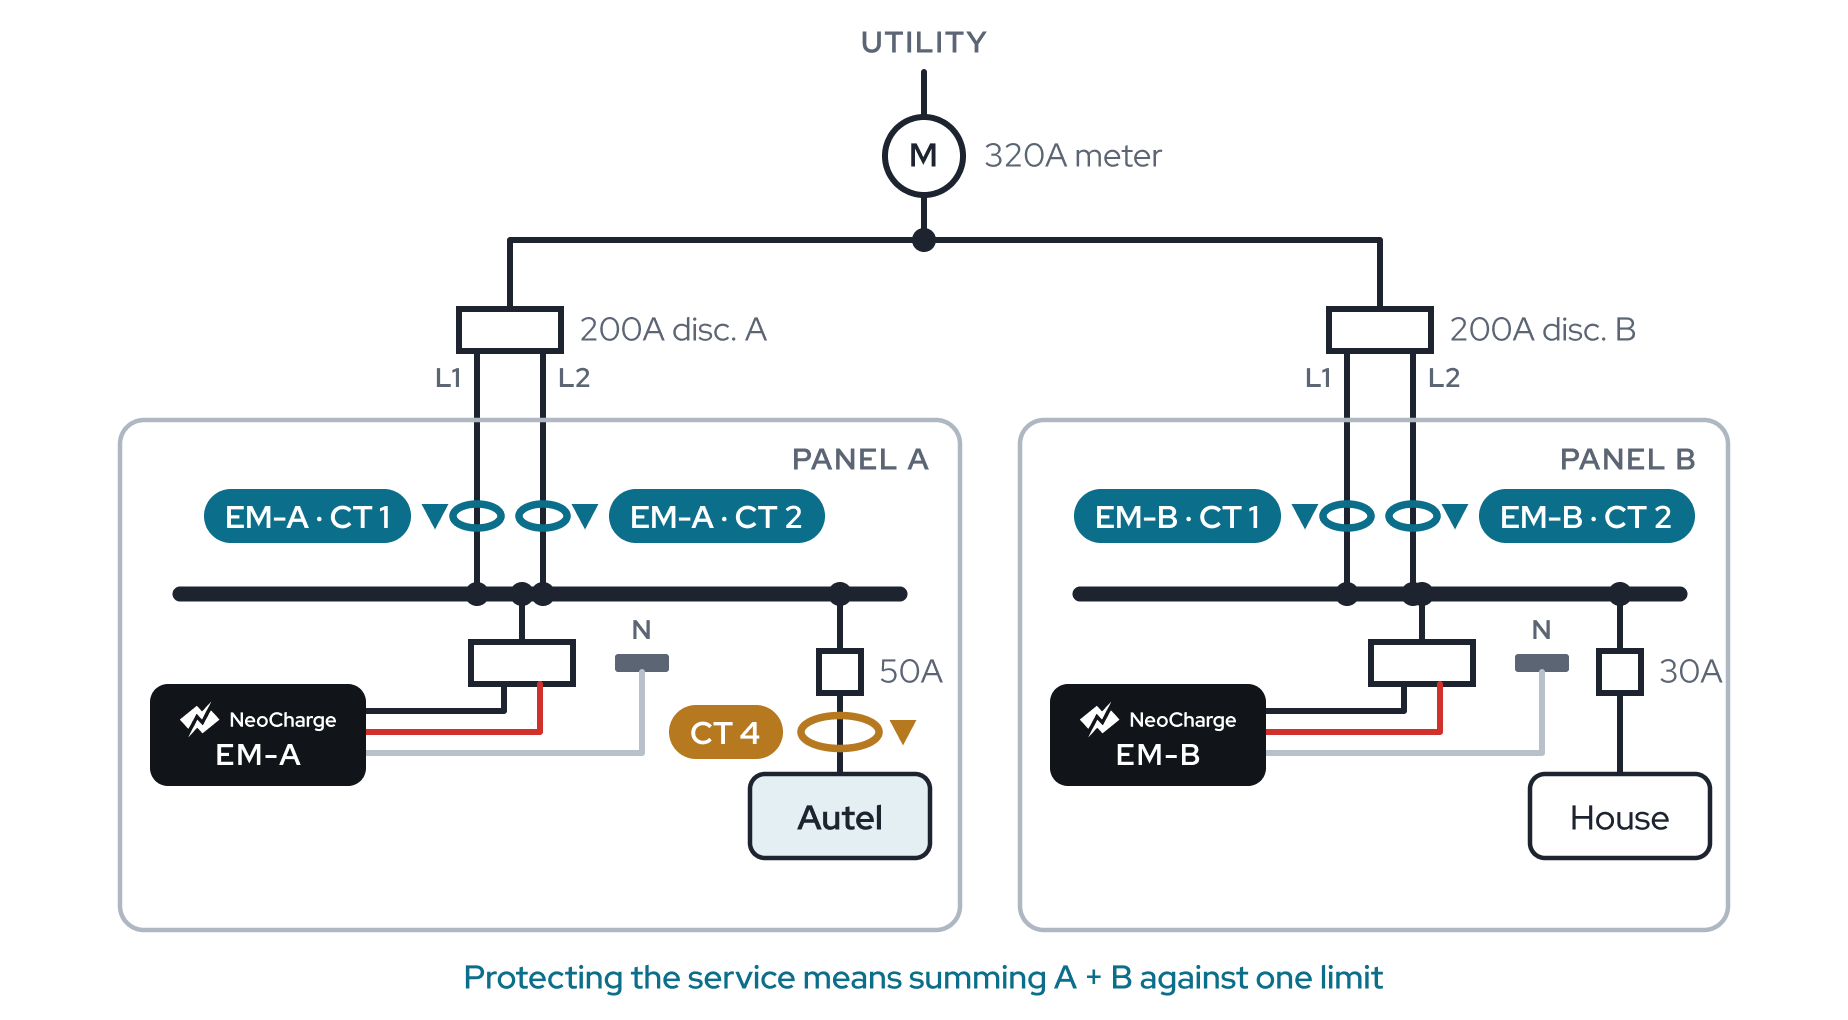
15 one-line diagrams, sorted by the equipment on site. Each shows where CT 1–4 go and how to set the app.
Battery, with or without solar
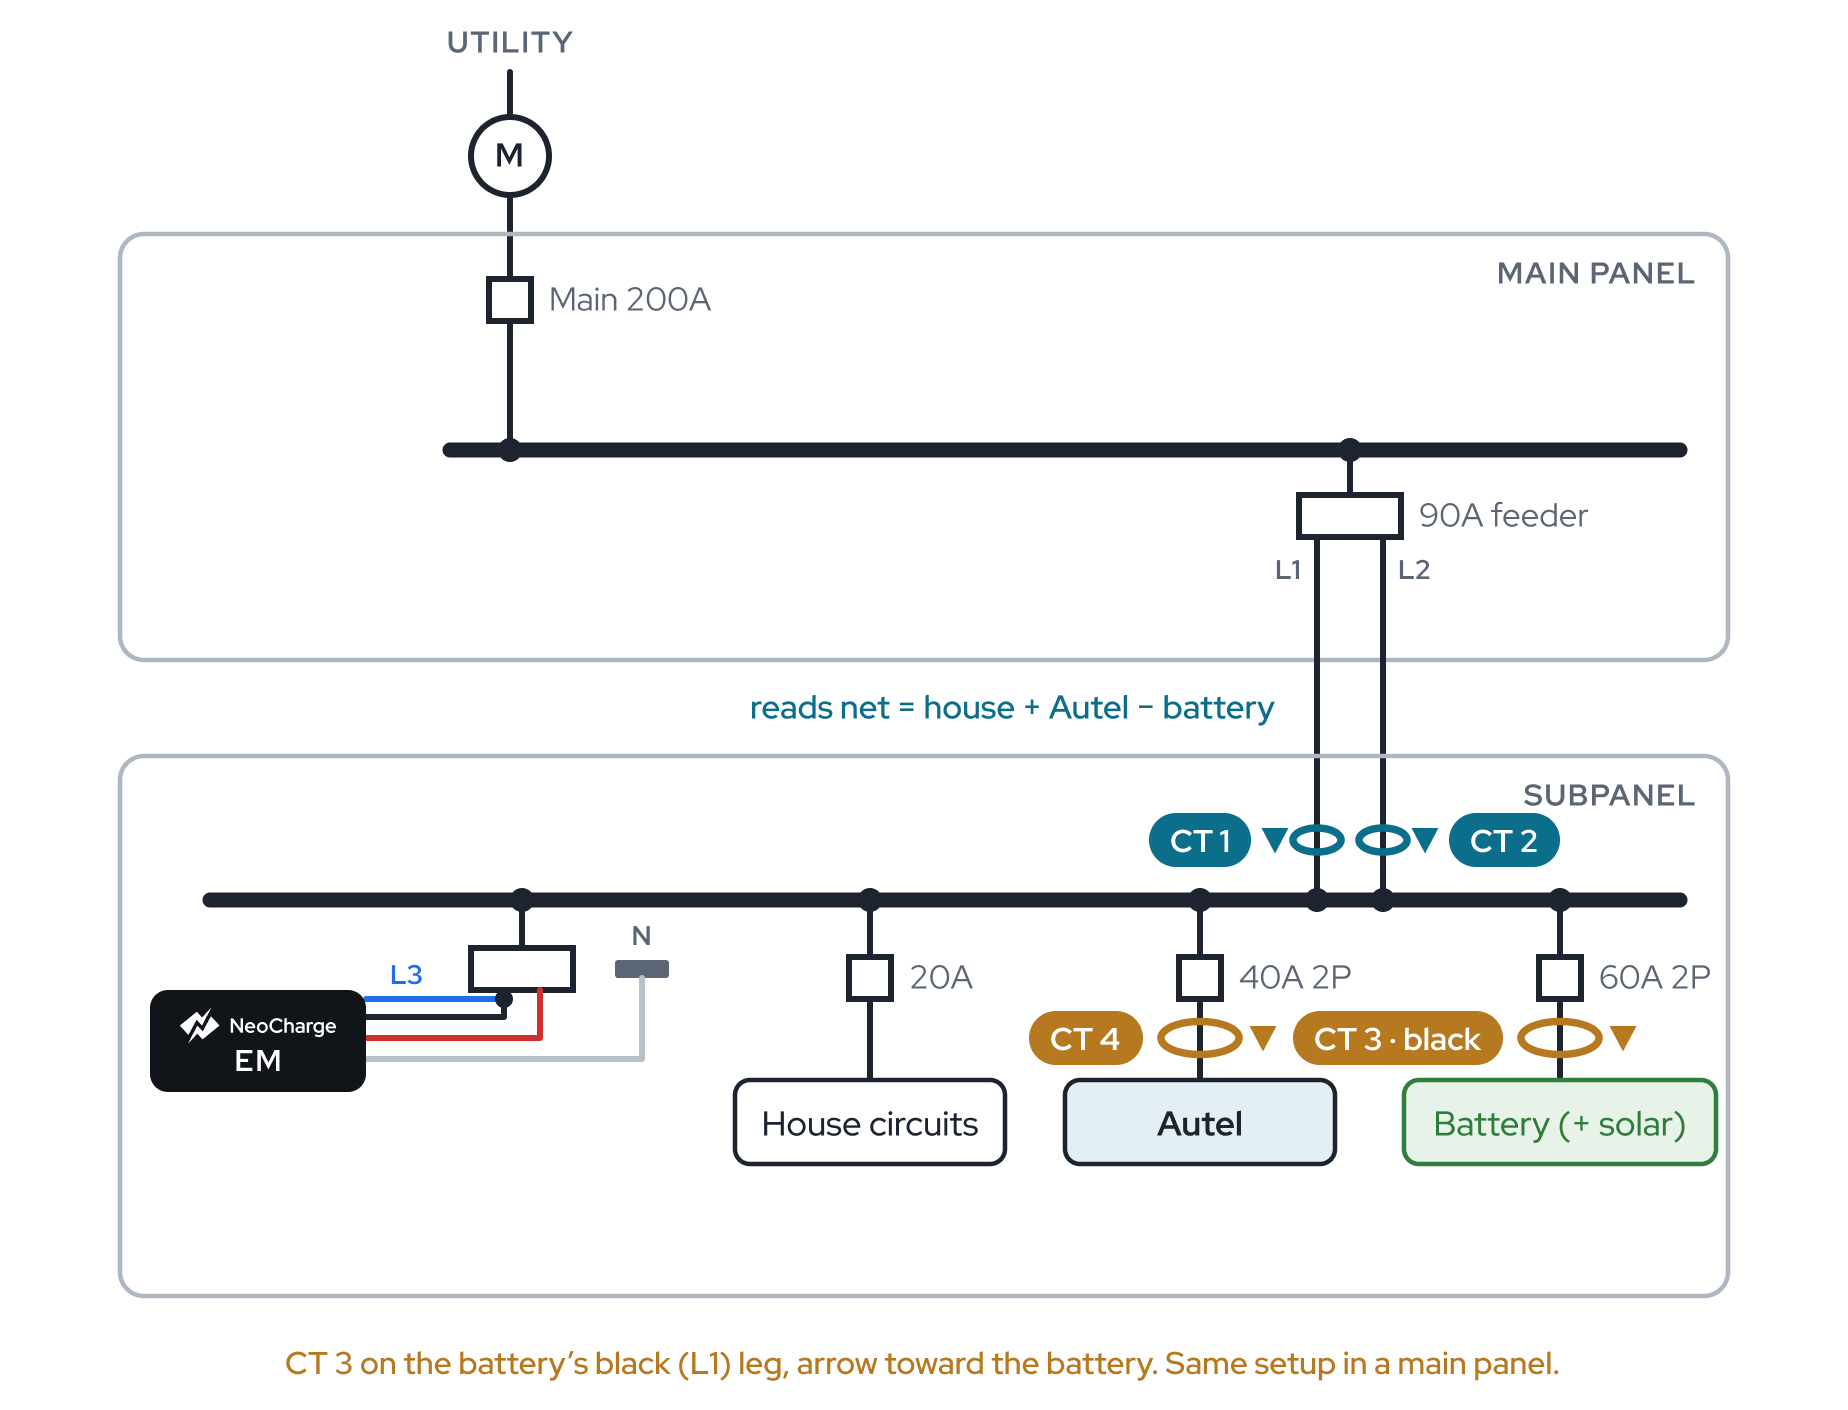 Battery backfed in the Autel's panel
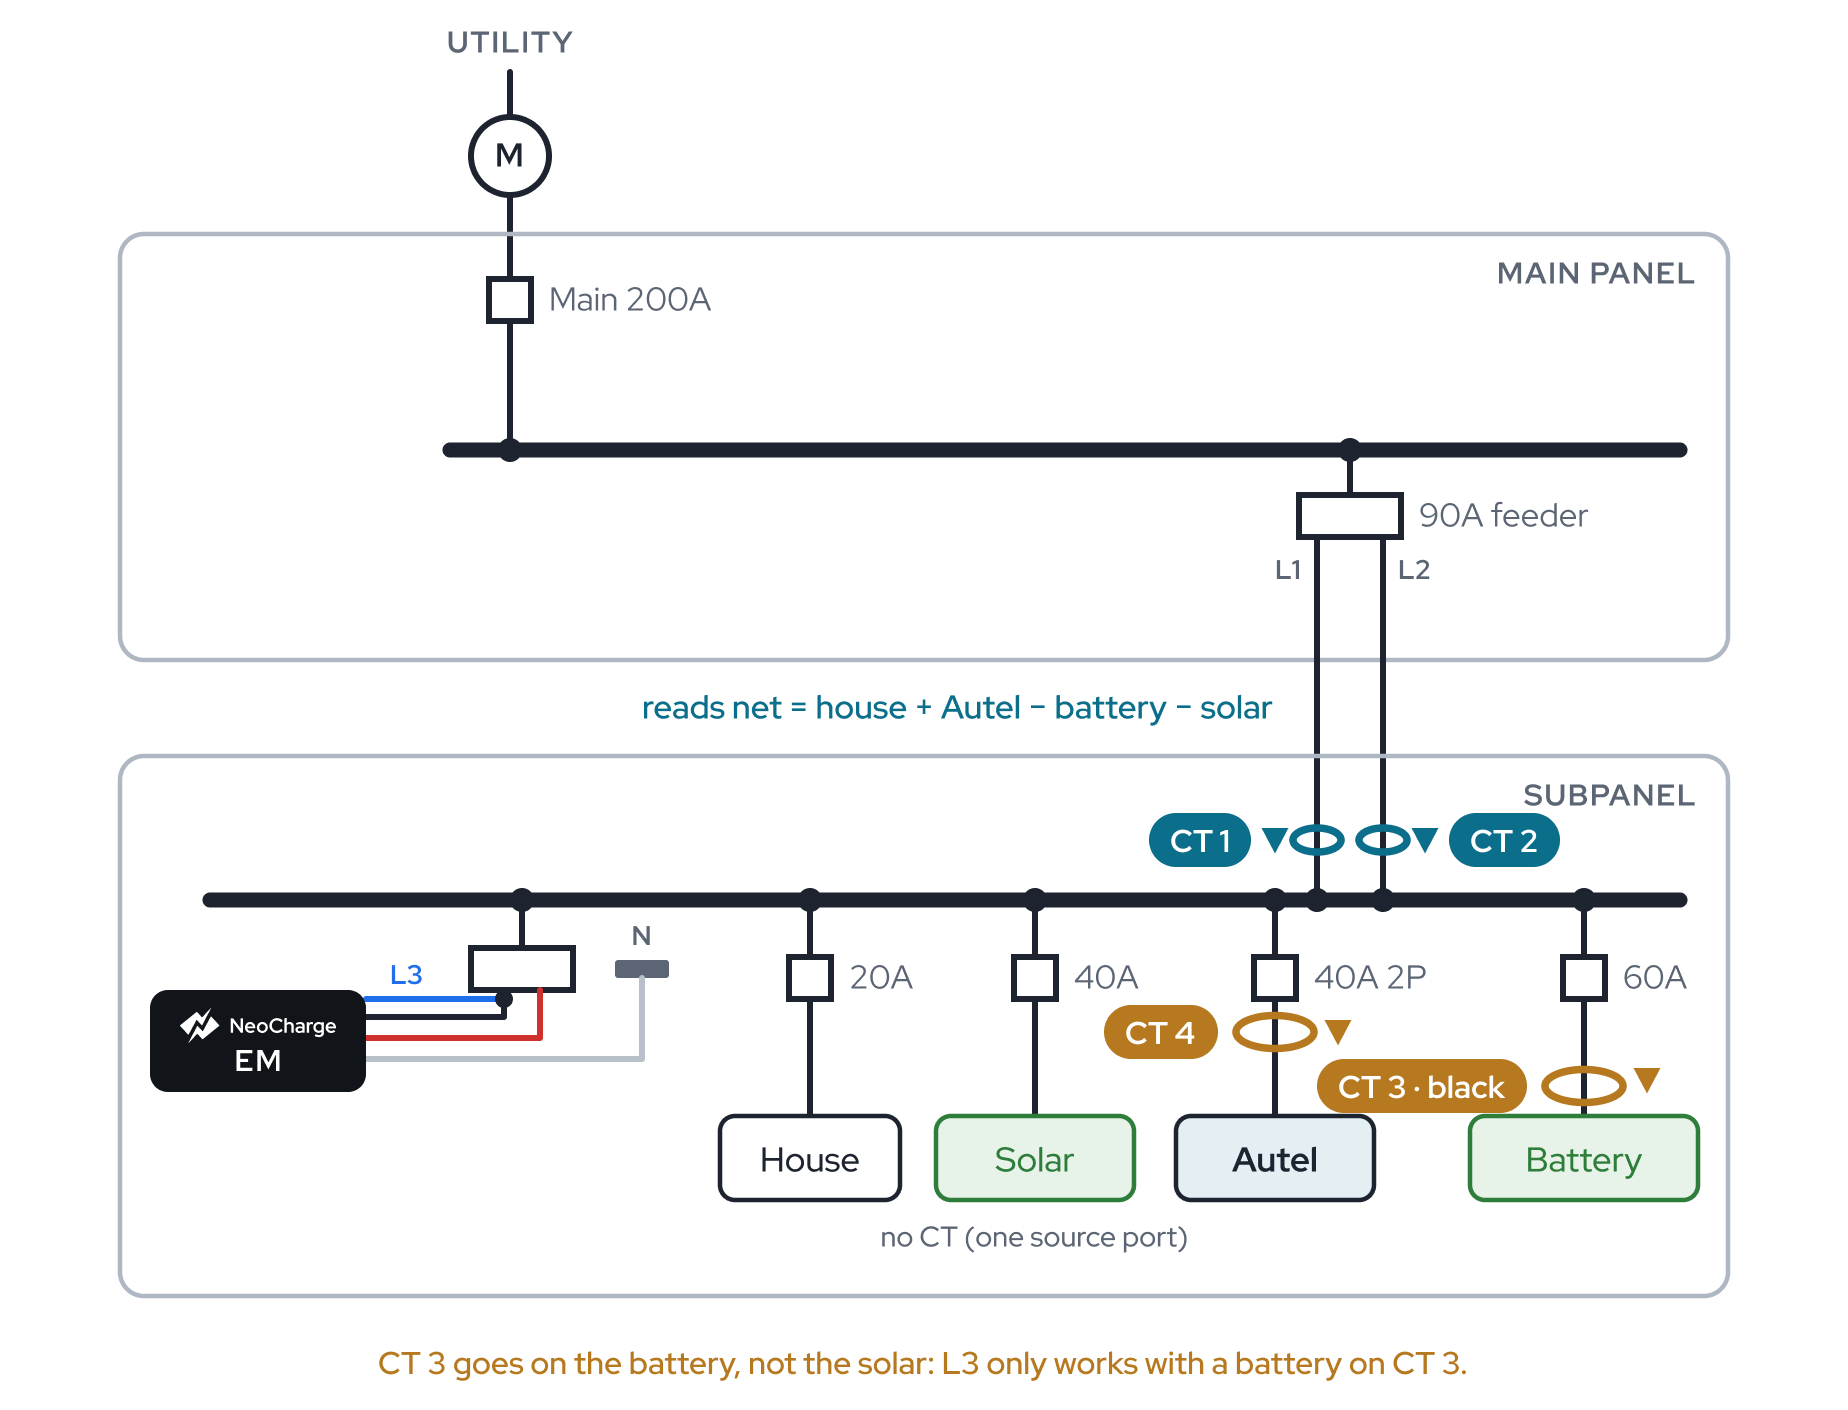 Battery and solar on separate breakers
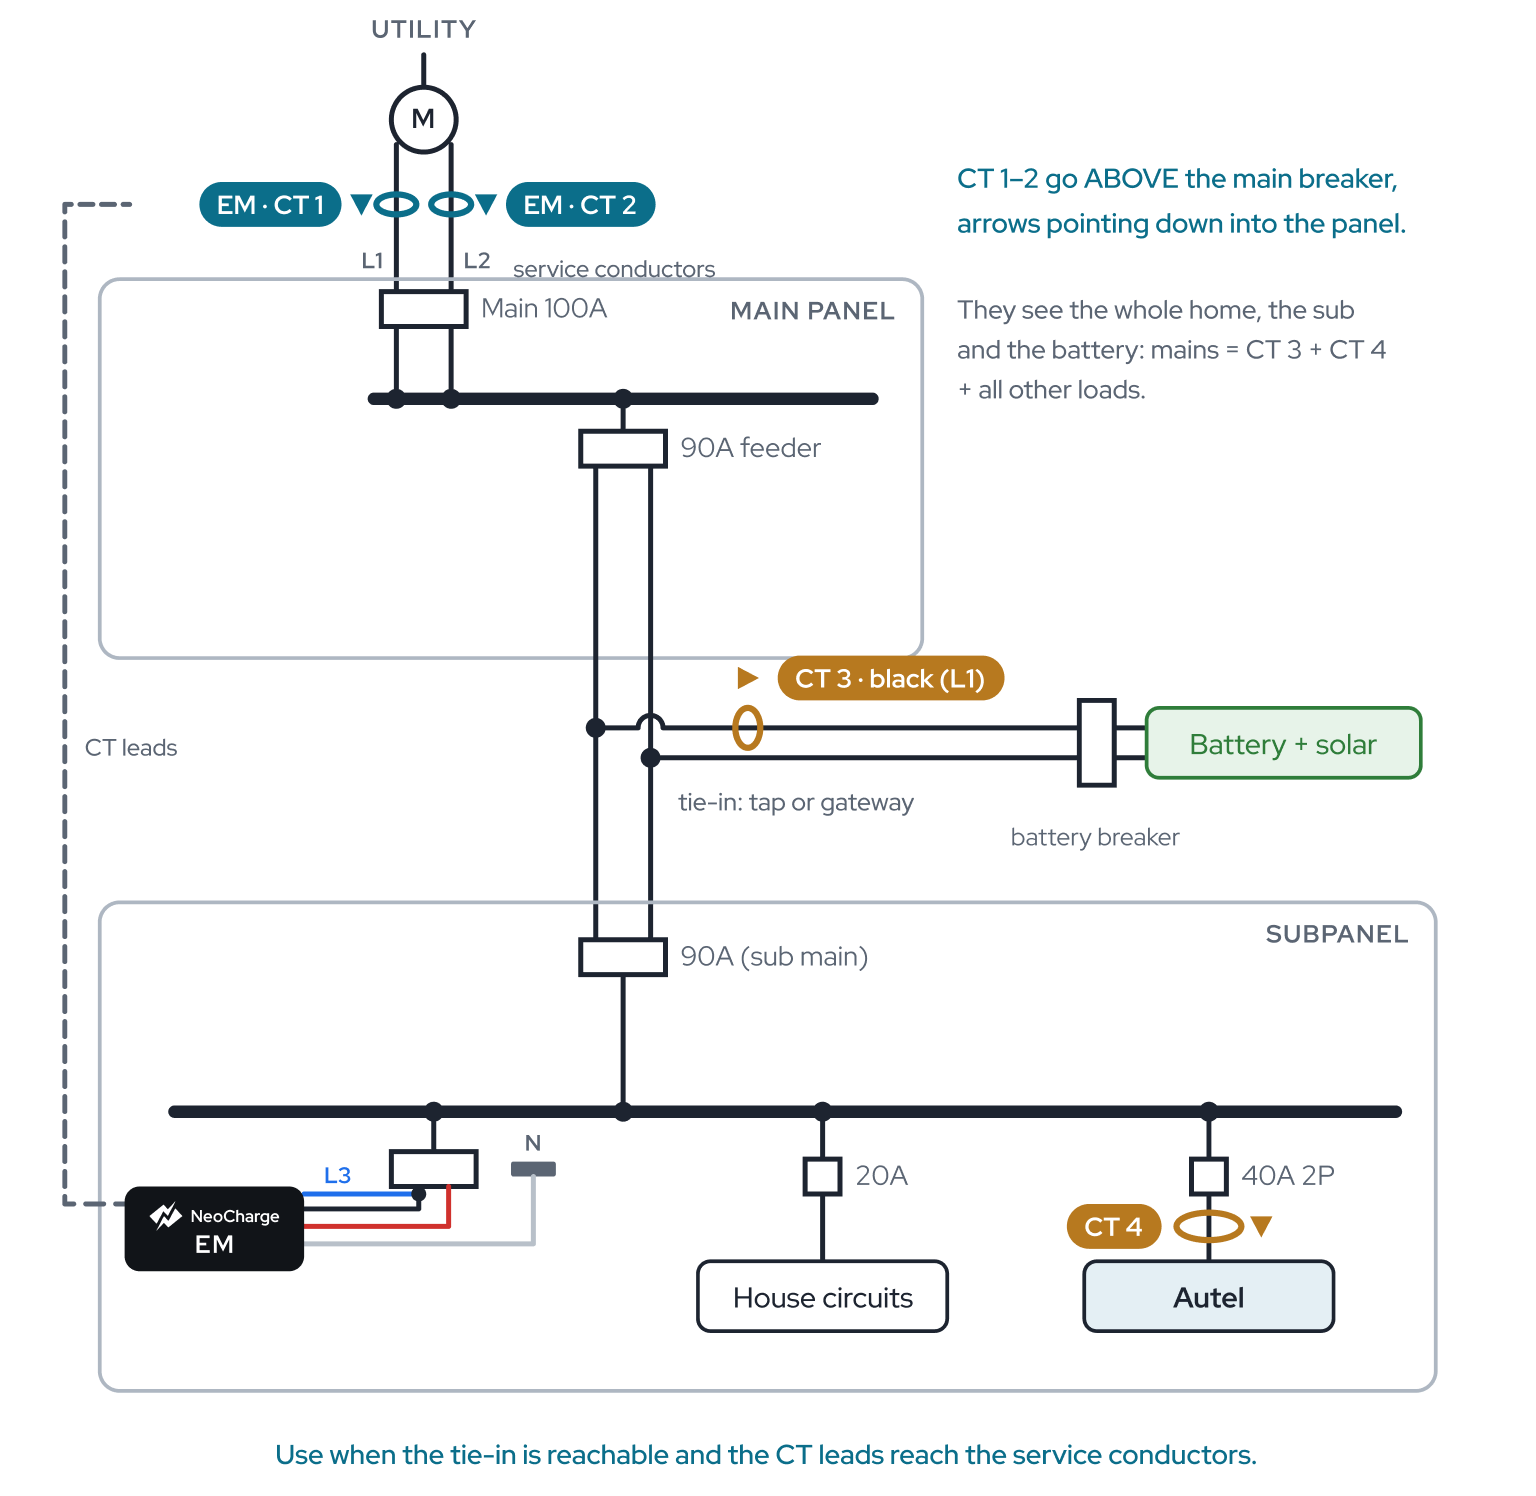 Battery tie-in, mains upstream
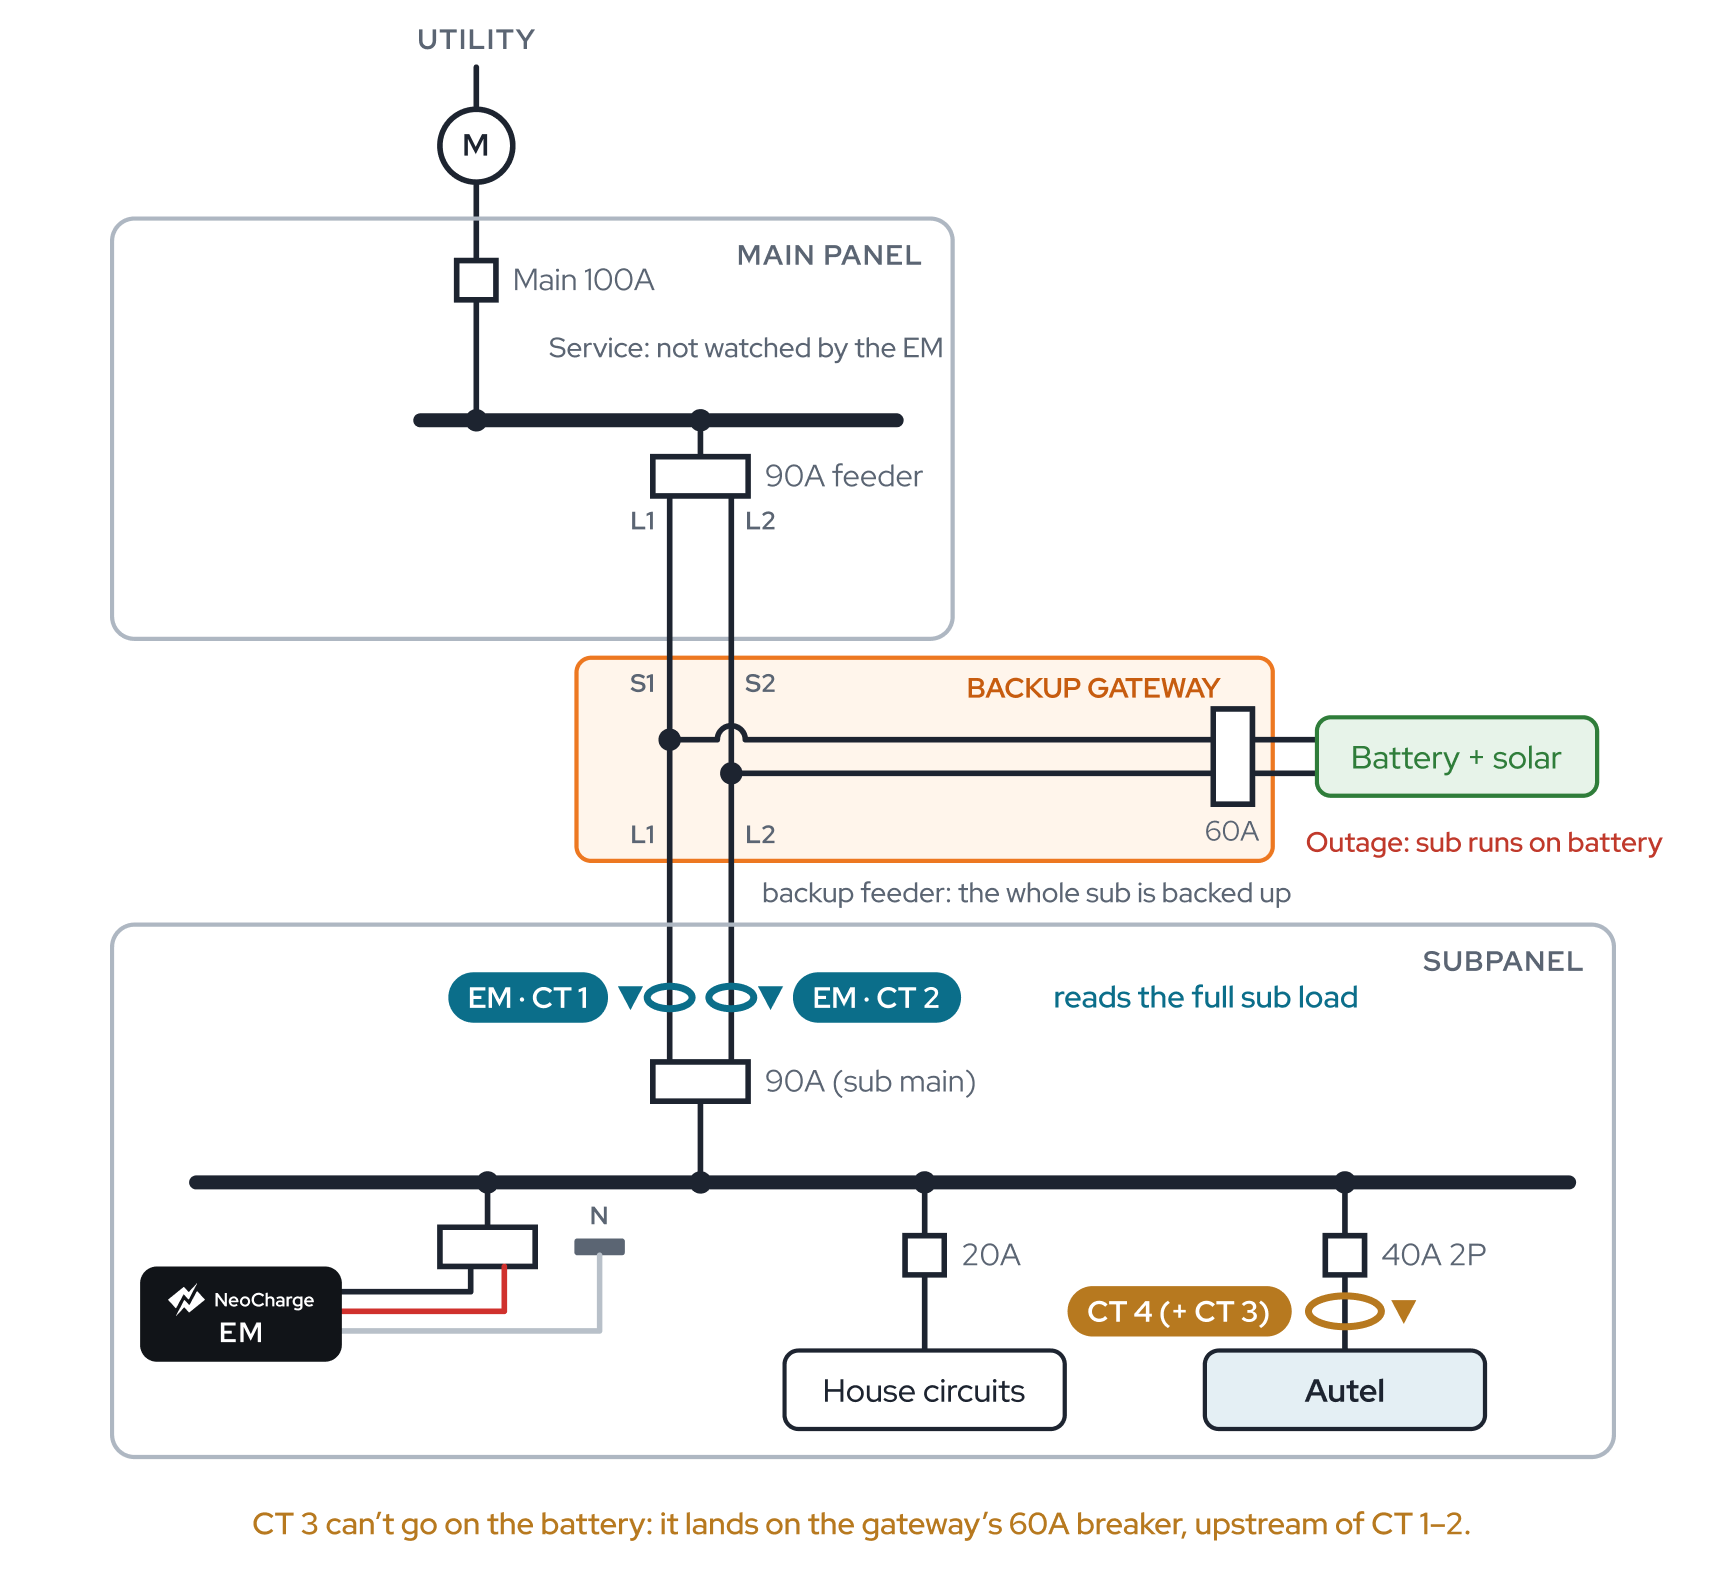 Battery in a backup gateway, mains on the sub
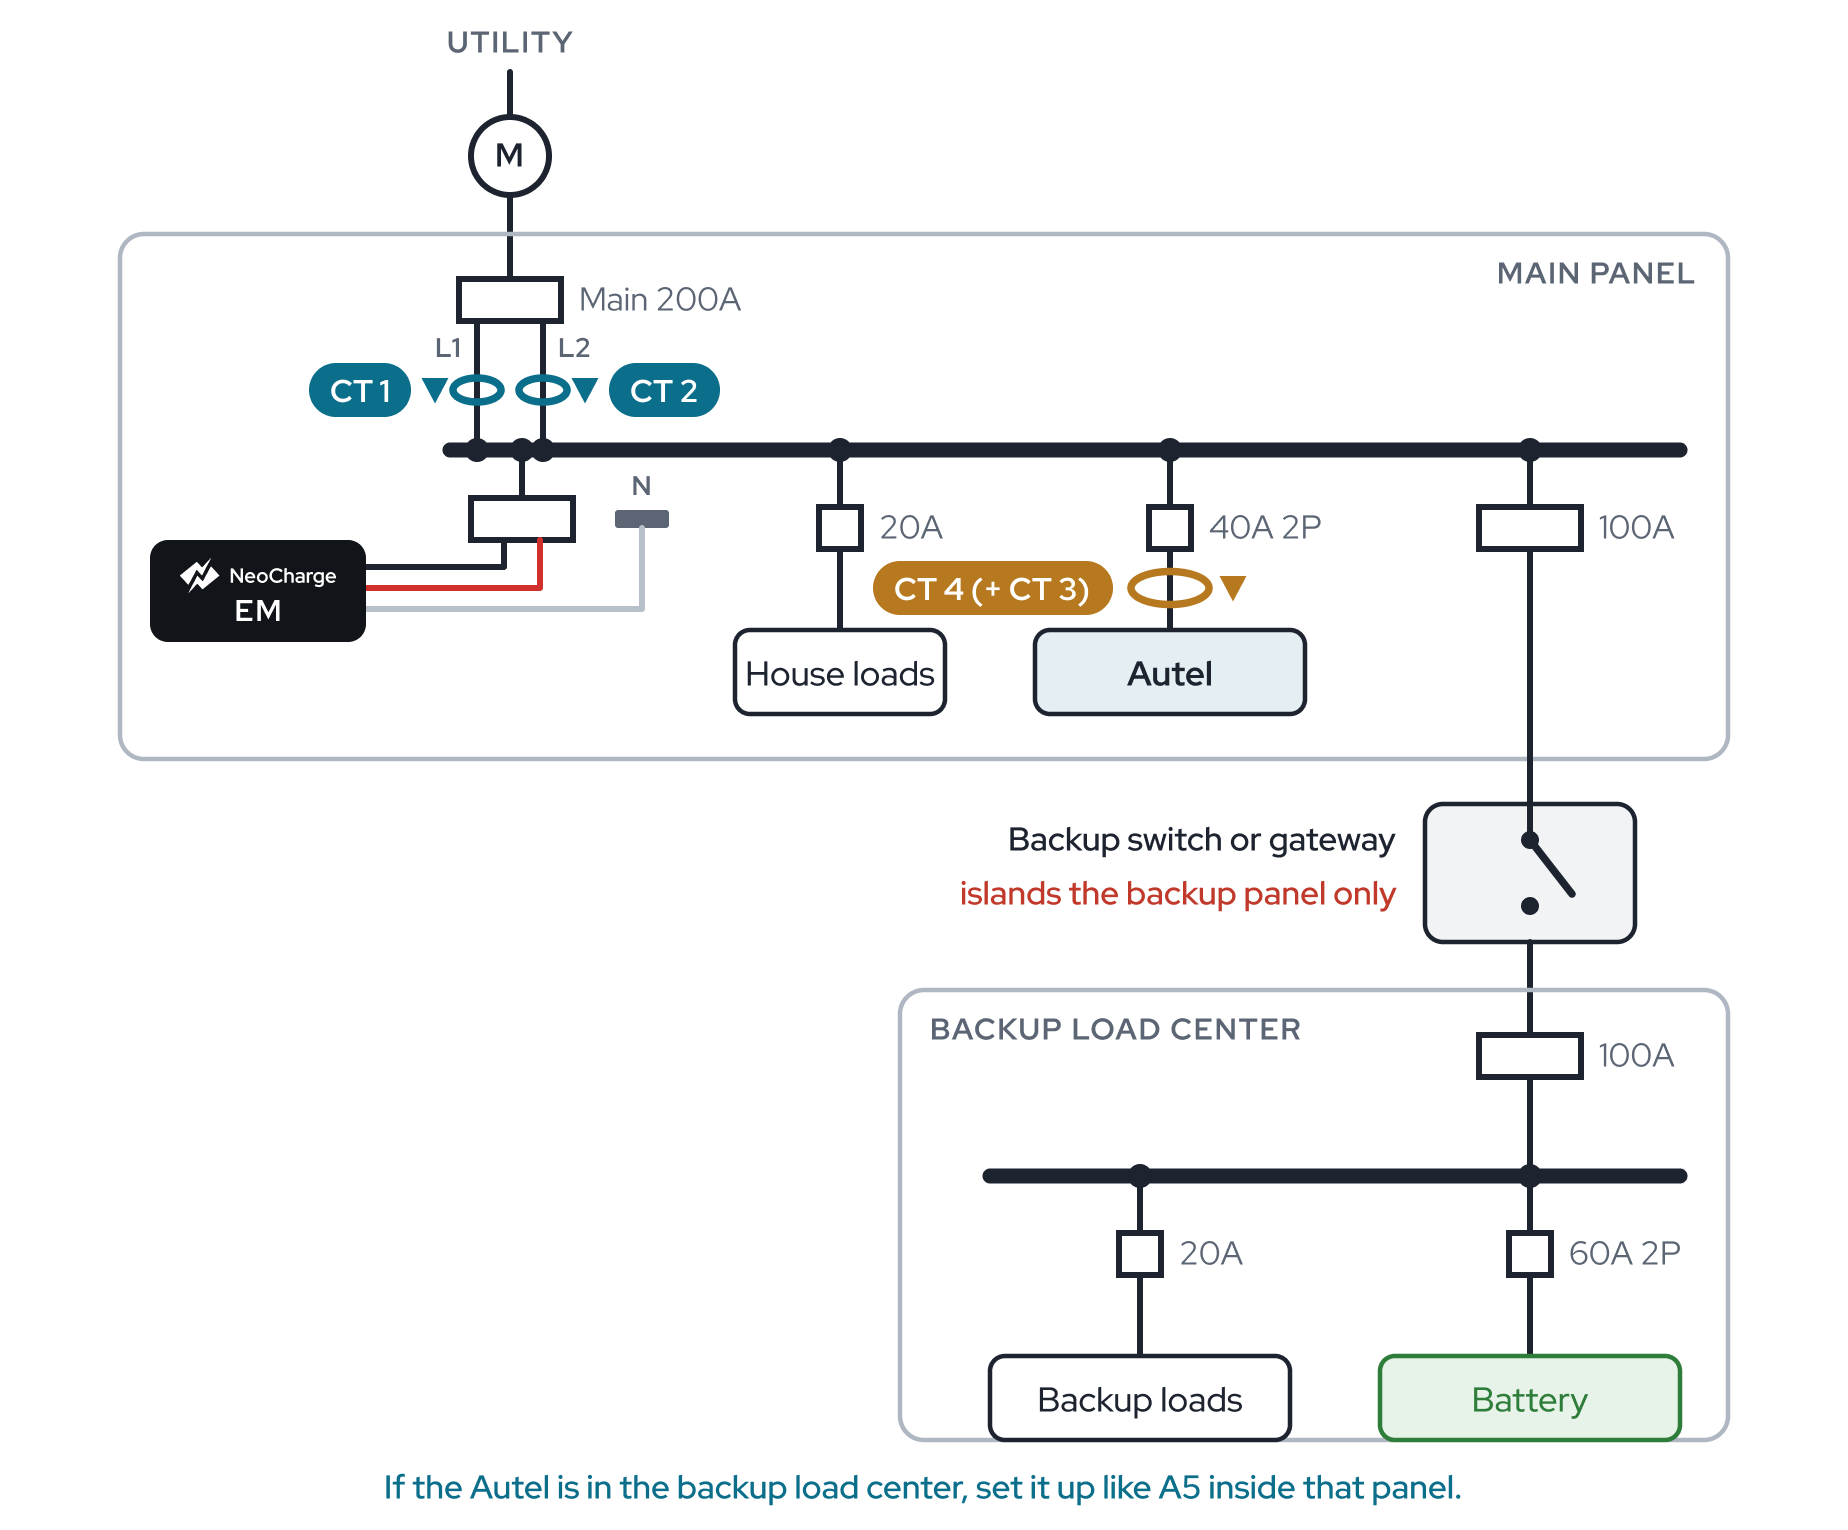 Battery in a backup panel, Autel in main
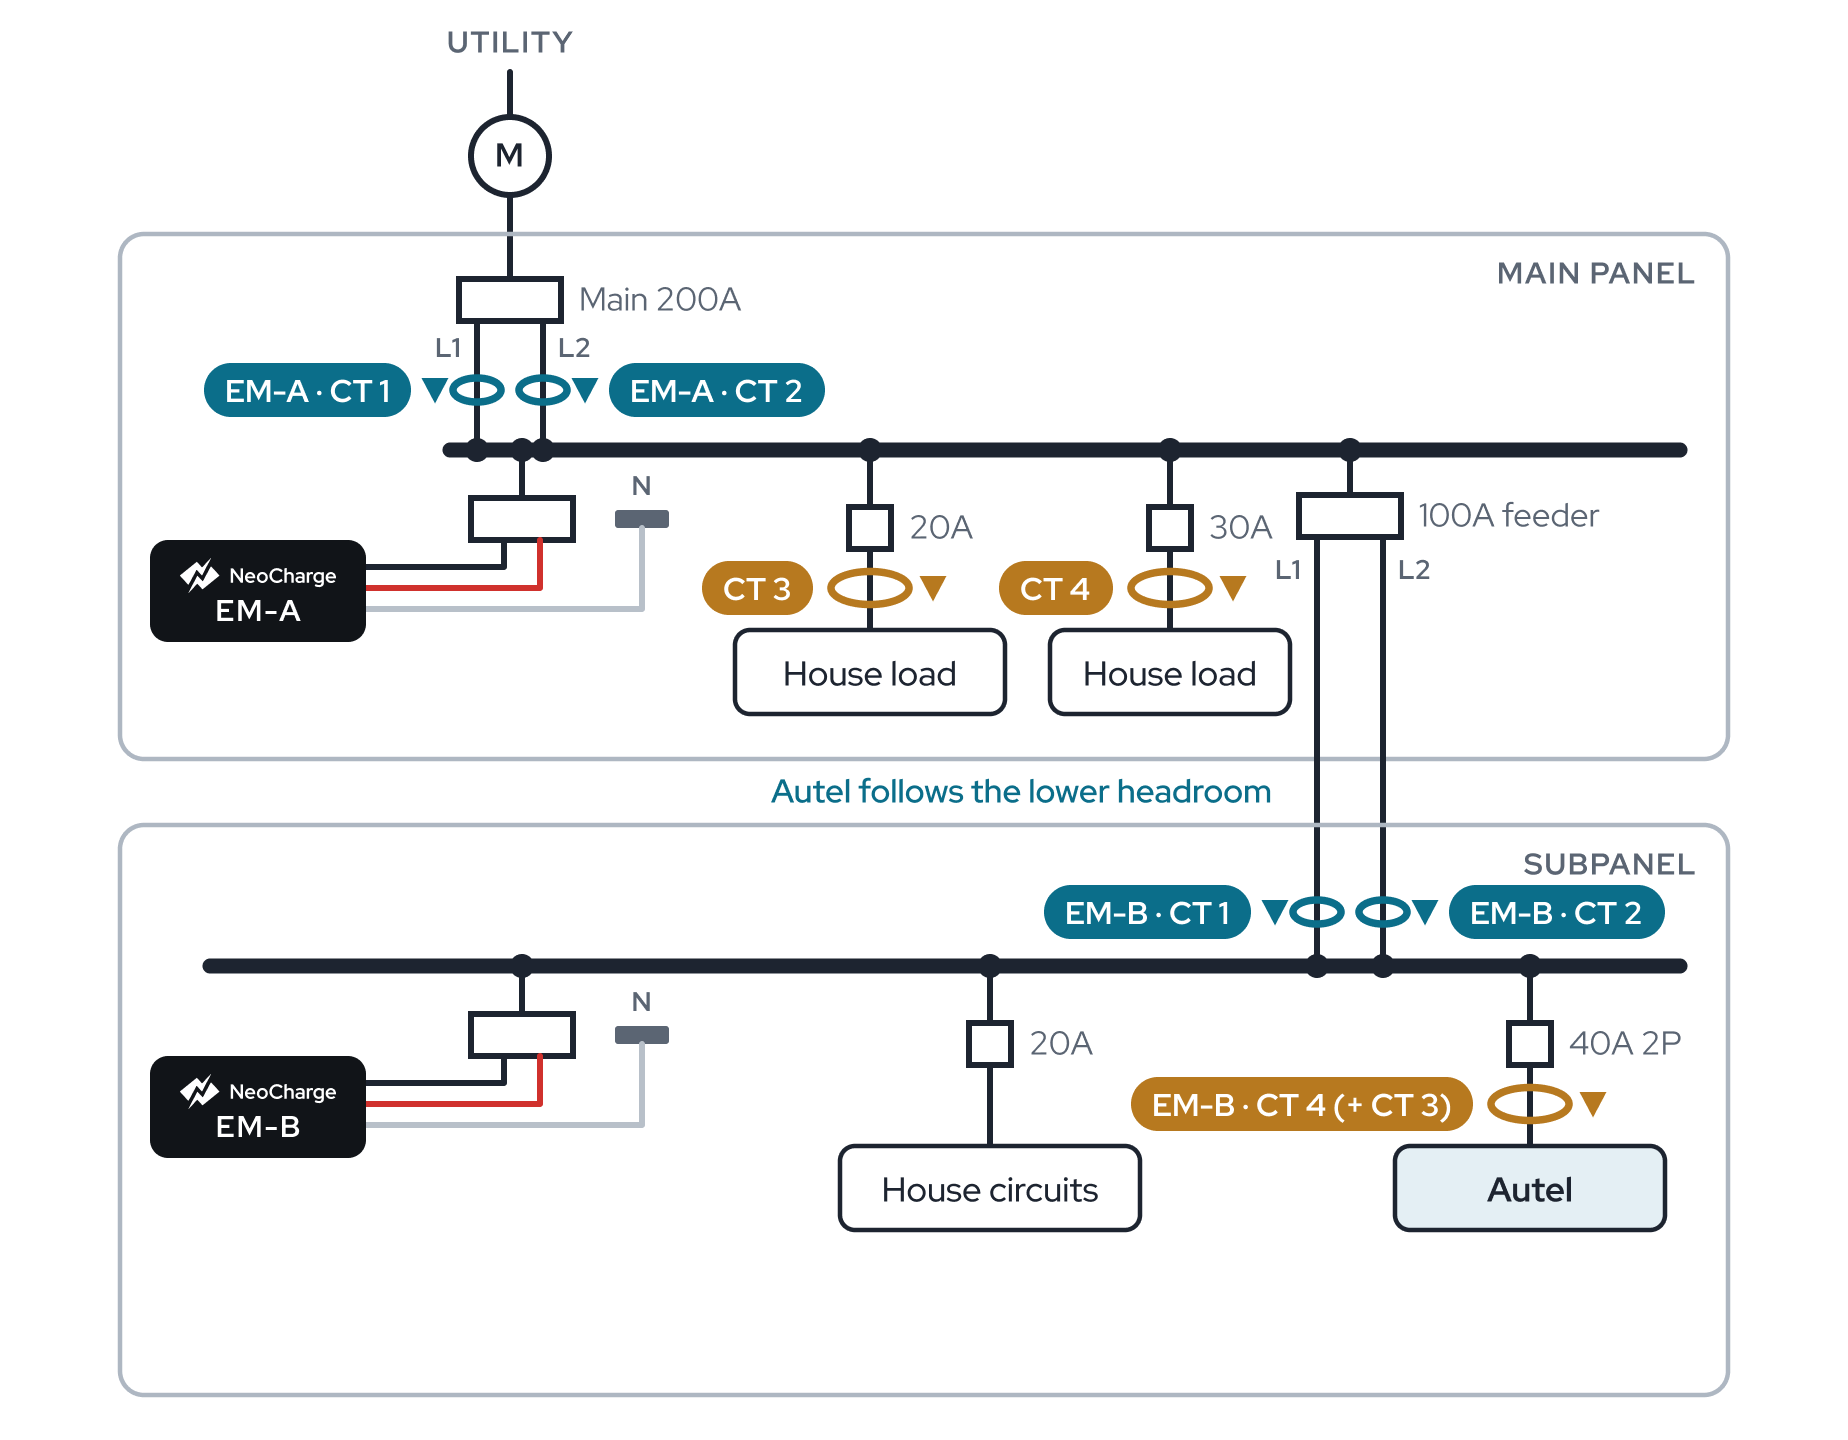
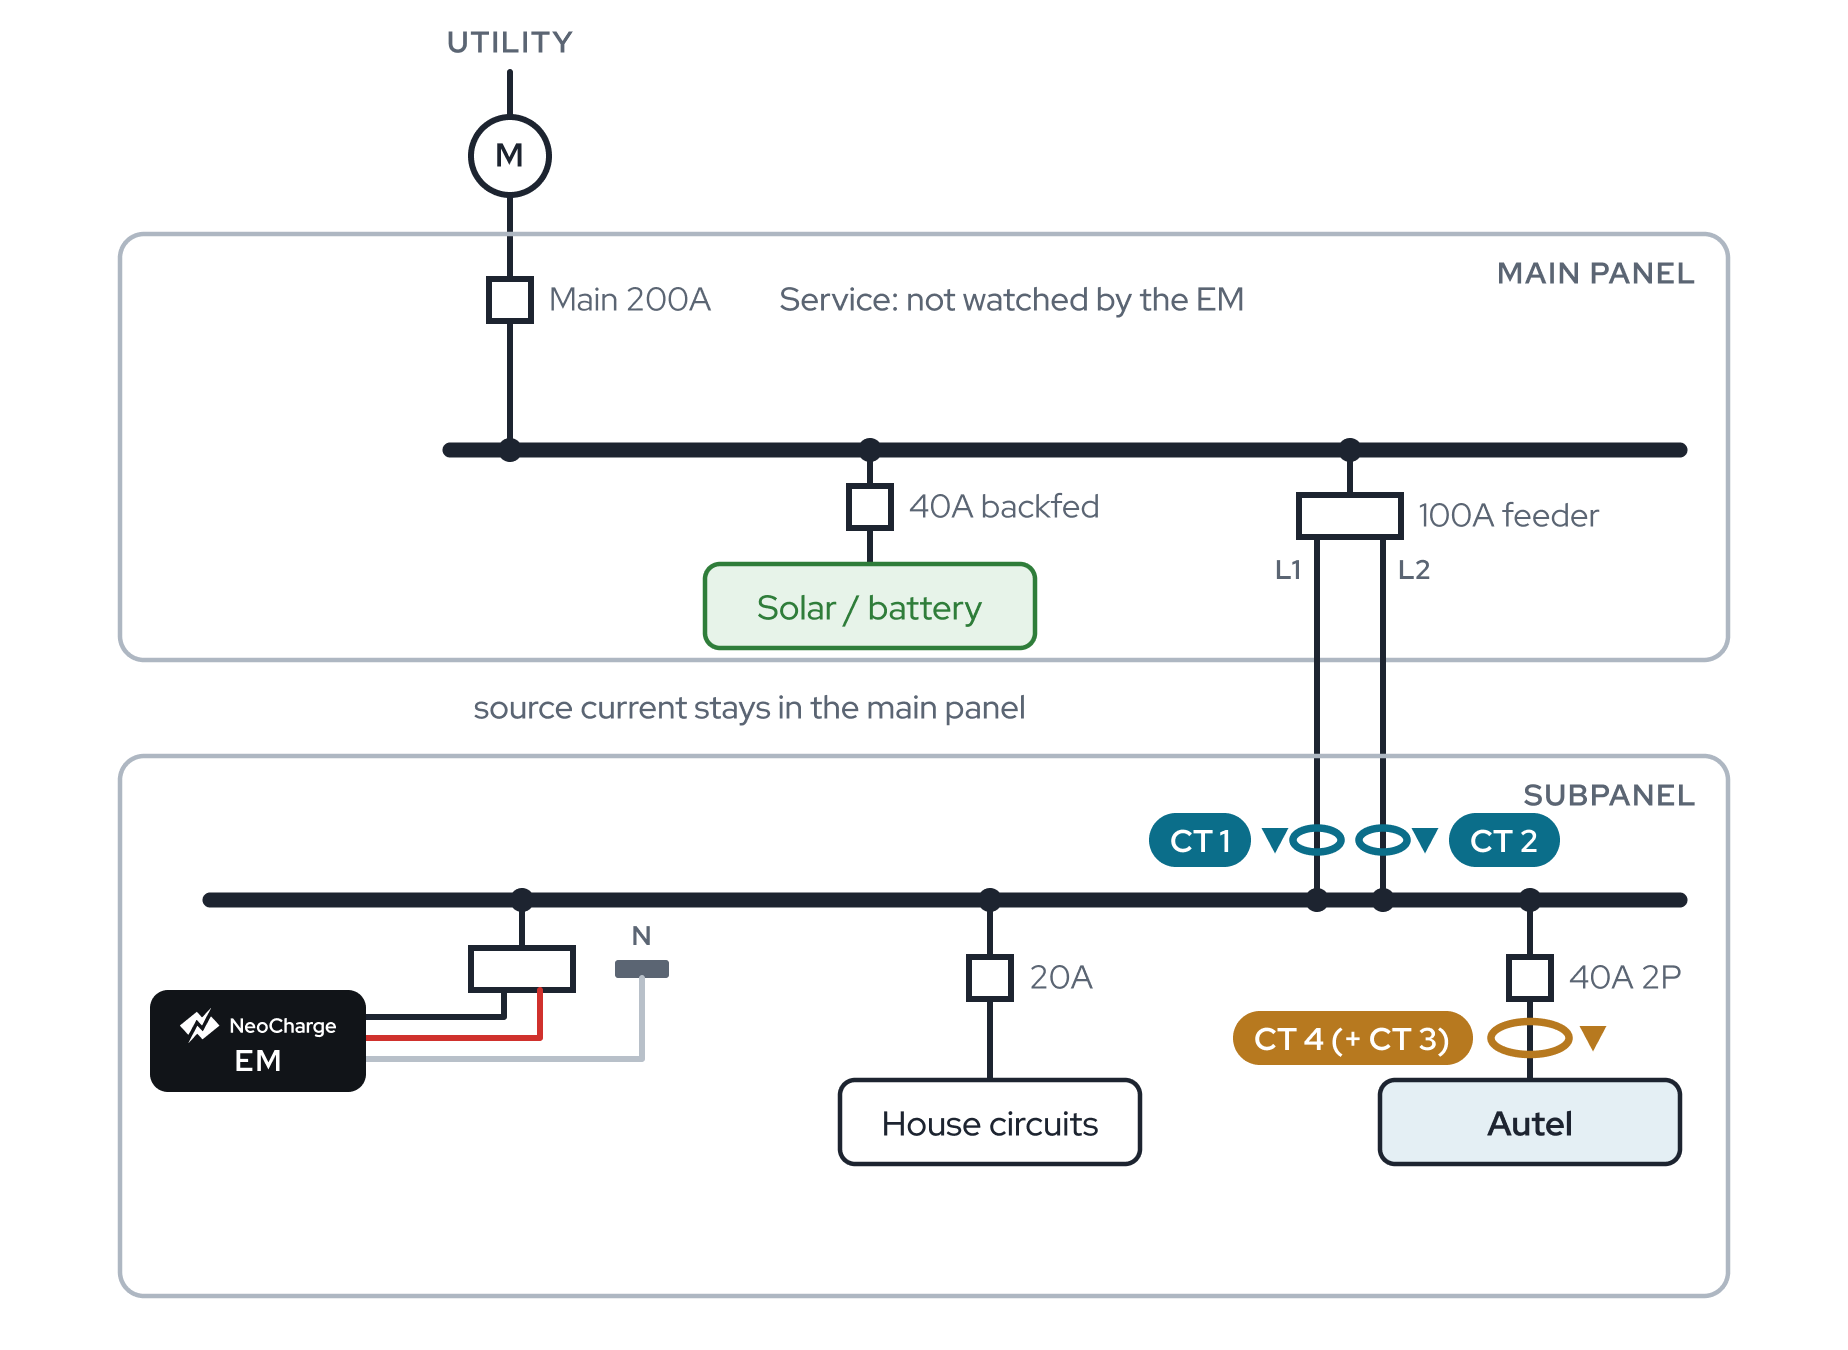 Source in the main panel, Autel in a subpanel also listed under Solar
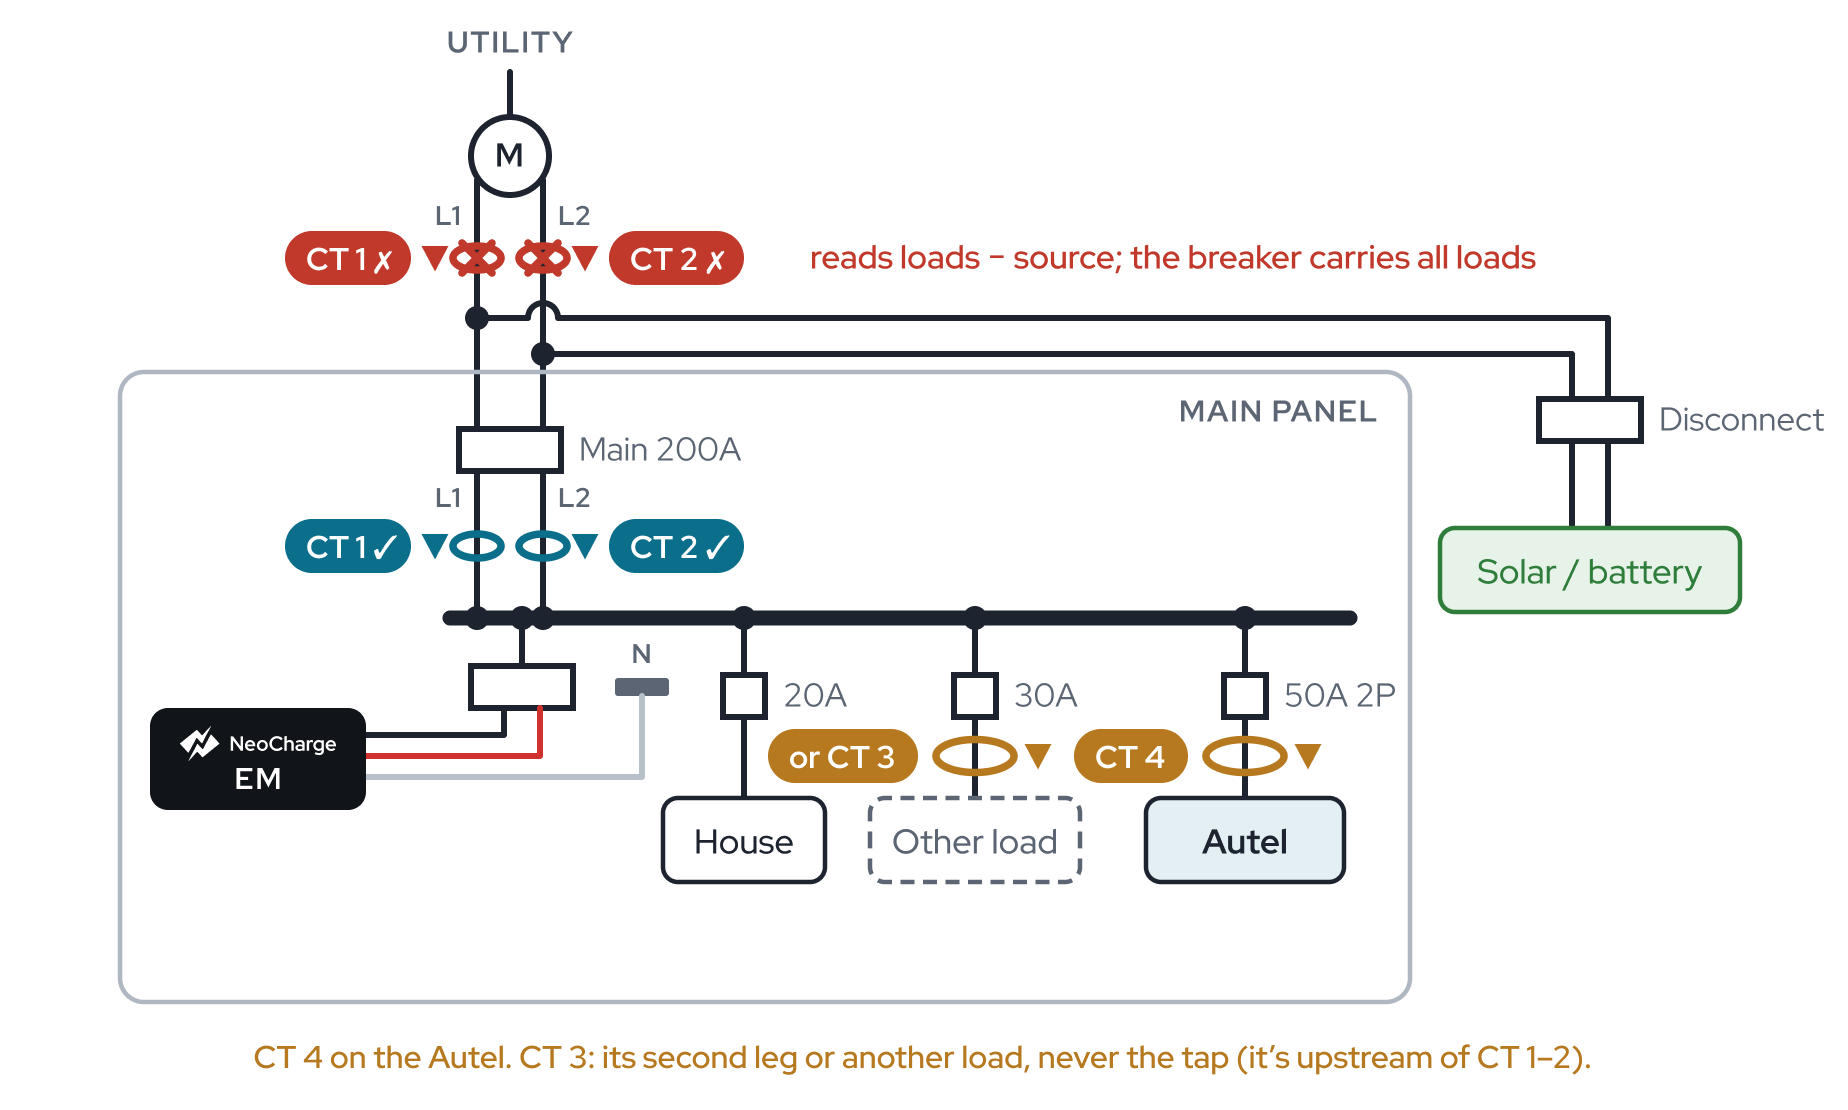 Line-side (supply-side) tap also listed under Solar
01About this guideWho this guide is for, how the Energy Monitor and EMS work together, and how to tell which sensor kit you have.
02Safety informationSafety alert symbol, signal words and the full list of safety warnings for installing the NeoCharge Energy Monitor.
03Before you goScope the job, stock the truck, check the site and start the Autel firmware update before any panel work.
04What's in the boxBox contents for the split-core and flexible kits, the monitor's connections, the port map and the voltage harness colours.
05Install the Energy MonitorStep-by-step hardware install of the Energy Monitor, voltage harness, internet connection and all four sensors, with split-core and flex variants.
Open Install the Energy Monitor →- Step 1: Photograph the back label
- Step 2: Turn off the main breaker and remove the cover
- Step 3: Mount the monitor
- Step 4: Plug in the voltage harness
- Step 5: Wire power to the monitor
- Step 6: Connect the internet
- Step 7: Install the main sensors (CT 1 and CT 2)
- Step 8: Install CT 3 and CT 4
- Step 9: Dress the leads
- Step 10: Photograph the sensors
- Step 11: Cover on, power on
- Step 12: Set up the EMS
- Two Energy Monitors (main panel + subpanel)
06Flexible (Rogowski) sensorsThe flexible-sensor kit in depth - when to use it, kit parts, mounting the power supply and integrators, coil orientation and centering, cabling and flex-specific troubleshooting.
07Wiring diagrams by siteFind the case that matches the home, then place CT 1–4 and set the app exactly as that case shows.
08EMS setupSix steps to pair the Energy Monitor and the Autel into an energy management system and reach "Energy Management verified".
Open EMS setup →- Step 1: Install the Autel
- Step 2: Update and reset the Autel
- Step 3: Install the Energy Monitor
- Step 4: Add the Autel charger to the NeoCharge app (OCPP)
- Step 5: Set up the Energy Monitor and EMS
- Step 6: Test charge and verify
- Hand off to the homeowner
- How the EMS behaves during interruptions
- Two Energy Monitors
09Before you leaveThe closeout checklist, the four required photos and who to call before you leave site.
10TroubleshootingField problems organised by what you see - status light, app, Bluetooth, Wi-Fi, OCPP, PINs, charging limits and sensor readings.
Open Troubleshooting →- No status light
- Status light is orange
- The app can't find the monitor
- Bluetooth times out on the second try
- The monitor won't get online (Wi-Fi or Ethernet)
- The charger is offline in the NeoCharge app, or OCPP won't verify
- The Autel app says the serial number and PIN don't match
- The installer PIN is rejected
- Charging is stuck at 16 A, 7 A or another low value
- Charging paused
- Readings don't match
- Readings are negative
- Port or sensor mix-ups
- Status light
- Factory reset the Energy Monitor
11ReferenceStatus light meanings, technical specifications, certifications, FCC statement, and support contacts.
Need help on site?
NeoCharge +1 888 944 5581
support@getneocharge.com
help.getneocharge.com
Autel 1 (844) 765-0150
support@getneocharge.com
help.getneocharge.com
Autel 1 (844) 765-0150
